Sunday, 26 August 2012

My Week with Instagram

GRAND NEWS! I am now the proud owner of an iPhone! I must say, I am rather stoked beyond words about this. I have been wanting one of these fancy-pants mobile devices for quite some time now. And recently, as I have been seeing more and more people posting their Instagram photos, I have been wanting Instagram more and MORE! It came to the point where 50% of the reason I wanted an iPhone was to have Instagram.
Out on a Saturday morning run

BUT NOW I DO! Yes, just this past Wednesday, I got Instagram. It is a special day in the Life of Larissa. Mark your calendars.

Instagram/iPhone photos in general are so great because it gives you the chance to capture moments of your everyday life, and share them with your friends. The photos are often photos I wouldn't normally have, because I would not normally have my camera with me! Such as whilst on a morning jog, and the world just looks to beautiful to leave un-photographed.

So, new feature: My Week with Instagram! Just so I can look back on the little things that made me smile each day. (This one's a little short, seeing as I have only had Instagram since Wednesday. But I am eager.)
Wednesday
Thursday
Friday
Saturday


Christina cutting the Oreo Birthday Cake I made for her

Recipe to come soon? Hopefully


Bananas Foster dessert from Murrieta's


SWEET LORD THIS WAS THE BEST THING EVER. All that sauce on the bottom? Caramelly, Rummy and Yummy.


The Cookie Monster, strolling along 9th Avenue


Later I saw him chasing after two cookies. No lies.


A runner. That is I.


I have been trying to get more runs in lately. Especially because SAIT Cross Country starts up again VERY soon! And I will be running nearly 6 days a week... oh boy


Sunday


The Sunday sun, setting over the city, AKA my view from the workplace. Yep, this definitely makes work a little awesome.


Hope you also had a lovely week... the last full week of August! WOW

<3 Lari

Chocolate Crackle Cookies

How to lesson # 1: How to make your co-workers like you.
There can be many answers to this question. Possibilities include: being a hard worker, offering to switch shifts with somebody in need, not making a mess in the staff room, being on time, etc. etc.

BORING.

A fail-proof solution, and my go-to: Make them cookies! Feed them delicious home baked goodies! You could make these chocolate crackle cookies... instant friend makers as I like to call them.


I did in fact, make these for my fellow co-workers. The girl who started working when I did had her last shift the other day, so I did what I do best and gave her a parting gift of cookies. And fed the rest to everyone else! It makes farewells a little bit more sweet. Especially when you dunk them in powdered sugar before you bake them. The cookies, that is.
Oh man, these were pretty darn great.

They are super soft! They melt in your mouth! And they are totally chocolatey. What more could you ask for? Oh right, powdered sugar. Makes them look a little more dressed up. It also adds a nice little change of texture on the outside. Like a sugary shell.
How to lesson # 2: How to make Chocolate Crackle Cookies.
Chocolate Crackle Cookies
Recipe from this book.
  • 8 ounces bittersweet chocolate, chopped and melted.
  • 1 1/4 cups flour
  • 1/2 cocoa powder
  • 2 tsp baking powder
  • 1/4 tsp salt
  • 1/2 butter
  • 1 1/2 cups brown sugar
  • 2 eggs
  • 1 tsp vanilla
  • 1/3 cup milk (recipe calls for whole, which my fridge lacked, so I used skim)
  • granulated sugar for rolling
  • powdered sugar for rolling
  1. Sift together the flour, cocoa powder, baking powder and salt.
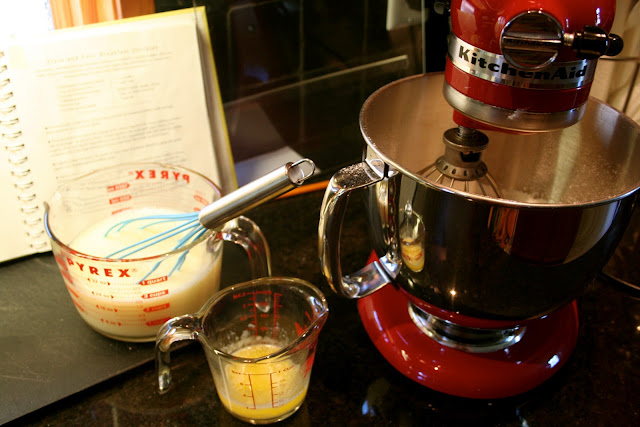
  2. Beat butter and sugar with a mixer until pale and fluffy, 2-3 minutes. Mix in the eggs and vanilla, then the cooled melted chocolate. Reduce the speed to low. Add in half the flour mixture, followed by the milk, and then finally the other half of the flour. This method is easier than the route I took: Forget completely about the milk altogether, realize it after refrigerating the dough, and attempt to mix it into an already chilled and hardened dough. Don't get me wrong, I made it work ;) but I would not recommend it.
  3. Divide your chocolatey dough into four equal pieces, wrap each in plastic and refrigerate until firm, about 2 hours.
  4. Once dough has chilled sufficiently to your standards, divide each piece into 16 little chunks. Roll them into 1 inch balls, and coat them with the granulated sugar. Next, treat them nice and roll them in a little powdered sugar. It is like a day at the Sugar Spa. place on a parchment lined baking sheet, and flatten them just a wee bit if you like... but not too much! Or they will not be the soft cookies of your dreams.
  5. Bake in a 350 oven (or if your oven is like mine, 325 is best) until the surfaces begin to crack. The recipe indicates 14 minutes, but mine took less time, more like 10 minutes.
A note! The ever so wise Martha tells me (not personally, though I would like to think so) that it is important to roll the cookies in both sugars. When I first read that, I thought, TOO MUCH SUGAR. Then I realized, there is no such thing, and also, she tells us this because this way the powdered sugar stays on the outside of the cookie and does not soak in. Makes the finished cookie looking all pretty and white, and gives the outer shell a little bit of texture. Thanks Martha!

<3 Lari


Wednesday, 15 August 2012

Cheese Souffle

Cheese Souffle!

I am not the only one who became absolutely smitten when I saw the movie Julie and Julia. I am unashamedly part of the fan club 100%! This is why I came dashing in the door from work, to change into a more appropriate outfit (Julia Child Style), take a dorky photo of it, and immediately commence the 100th Birthday Celebration for a most inspiring French Chef.

It took me all day to figure out exactly what I wanted to make.
Mousse au chocolaté: YES I LOVE CHOCOLATE (duh)... oh but it won't be ready until tomorrow? NOPE I want to celebrate immediately.
Boeuf bourguignon: Classic, oh but that takes forever and a day. Mother will not approve.
French Onion Soup: Ohhhh Mother will SO approve, but this also takes a while to caramelize the onions yada yada

I am noticing that good French food takes time. Which apparently I don't have much of. A little thing called SHOPPING FOR AN IPHONE gets in the way... which I totally don't mind...

BUT... Luckily for me and my desire to want to celebrate immediately, there is a classic french dish that:

  • I have never eaten but always wanted to
  • I have never made but always wanted to
  • I found a recipe by Julia Child for it on foodnetwork.com
  • It MUST be served immediately.
HOORAY FOR CHEESE SOUFFLE!

All puffy and golden and glorious. A cheese pillow.
I found this recipe here, but it is originally from Julia Child's book: Julia's Kitchen Wisdom. And boy does she have some wisdom in the kitchen.
Julia Child's Cheese Souffle
Recipe not at all adapted because it is delicious as is from Julia's Kitchen Wisdom. Serves 4

  • 4 tbsp butter
  • 2 tbsp finely grated parmesan
  • 3 tbsp flour
  • 1 cup hot milk
  • 1/4 tsp paprika
  • pinch nutmeg
  • pinch of salt and pepper
  • 4 egg yolks
  • 5 egg whites
  • 1 cup grated swiss cheese

Preheat the oven to 400 degrees F.
Butter a 6-cup souffle or straight-sided baking dish with 11/2 tablespoons butter. Dust the interior of the dish with the Parmesan and knock out the excess.
In a large saucepan, melt the remaining butter over medium high heat. Stir in the flour and cook for 2 minutes, stirring constantly, until the butter and flour foam and froth. Remove the pan from the heat and beat in the hot milk, then simmer over medium heat and stir slowly until thick, about 1 to 2 minutes. Remove the pan from the heat and whisk in the seasonings, then the egg yolks, 1 by 1.
Whip the egg whites to stiff, shining peaks, then whisk 1/4 of them into the sauce to lighten it. Delicately fold the remaining egg whites into the sauce, alternating with the grated Swiss cheese.
Turn the souffle mixture into the prepared dish and set in the oven. Reduce the heat to 375 degrees F and bake until the souffle has puffed 1 or 2-inches above the rim and has browned on top, about 25 to 30 minutes. Serve immediately!
Right away!
Enjoy it without haste!
Serve with a light salad, the best french baguette you can find, and that $2 steal of a sign from a garage sale.
This was my first soufflé that I have ever eaten or made and it was a success! I like this whole soufflé thing. I am thinking the next one shall be a dessert soufflé... chocolate, anyone? I already have a recipe in mind... :)
And as she would always say...
BON APPETIT!
<3 Larissa

Happy Birthday Julia Child

Today is August 15th which means that today would have been Julia Child's 100th Birthday!

And I feel the need to celebrate it.

I won't lie, the majority of my knowledge of Julia Child comes from the movie: Julie and Julia. But DOOD! That movie was SOO GOOD. I just fell in love. I was so inspired the whole way through watching it, and I'm pretty sure I was smiling dorkishly for most of the movie.

I'm not sure yet how I plan on celebrating this lovely lady's legacy today, but I sure will be thinking a lot about her and all the inspiration I got from watching Julie and Julia.

The exciting thing: I am not positive... but I think that I may have in fact inherited one of her cookbooks from my great Aunt (!). So there will definitely be some rummaging through our storage boxes tonight. And cooking, obvs.

Happy Birthday Julia Child!
Cooking is awesome.

<3 Larissa

How do you think you will celebrate this momentous occasion??

Sunday, 12 August 2012

5 Things of Awesome

It's Sunday! Not that it really matters for me because my weekend never seems to fall on an actual weekend. But for the majority of the world, another week has passed. 

Here's what I thought was awesome this week!

1) This photo of a pretty gal riding her bike, found via Pinterest. I love riding my little townie bike! I strive to look like this whilst riding.

2) These shoes are as sweet as Caramel Sauce. From ModCloth

3) THIS PHOTO. (Chocolate+RoastedCherry+SaltedAlmondIce Cream via Petite KitchenesseMust try soon... I am on a bit of a wanting-to-make-homemade-ice-cream kick.


4)  THE CUTEST CAMPER EVER. Oh I so want a little retro trailer... to sell cupcakes or pie from. Found via Pinterest
5) This adorable little painting on the side of a house, with blue windows. I would do this.

This week has been pretty sweet, hope the next one will be too!
What do you think is awesome this week?

<3 Lari


Saturday, 11 August 2012

We Have a Winner!

STORY TIME!

Bubble tea and I have had a bumpy past, I will not lie. I wanted to be part of that crowd that loves bubble tea and when I was in about grade 10 I decided to see what all the hype was about!

I went to China Town (Which by the way is one of my favourite places to go in the city!) with a friend and we decided to give it a shot. I chose honeydew flavour. I was slightly saddened that the only way it got this flavour was from a mysterious green powder. I was also slightly weirded out by the pearls... but I knew that it was probably just something to get used to. Unfortunately, I could not finish my tea... it was not making me feel so grand! So at that I kind of put a cap on my bubble tea dreams and just made up my mind that it was not for me.

But people kept on drinking it, everywhere! All the time! And worse yet? They would rave about how much they love bubble tea. I must have had a bad first experience or something, I thought. So this summer when I went to Kim Anh Subs to grab dinner with my friend Hayley, we said Yes Please! to also getting bubble tea. And guess what? I totally liked it. I was thrilled that I gave it a second chance! This time I had a Pina Colada flavour (Because Pina Coladas are my weakness, it's true). Again, the flavouring was only thanks to some powdery substance, but this one tasted absolutely delish, and I fell in love with Bubble Tea! I rejoiced. But only too soon. To my despair, about 15 minutes later I had the worst stomach pains! What the heck, world? How can you have bubble tea and I cannot? It simply isn't fair. :(


Despite the painful memories, I enjoyed my second attempt (while I was sipping at least) so much that I knew I had to try again. I was getting desperate here people. But good news! Third time's the charm! The saying works. I finally had a positive bubble tea experience at Thai Thai where I fully enjoyed a Pineapple-Mango tea, sans stomach soreness. Thank you, bubble tea lords! I am now part of the in crowd!

And if you didn't think that was a happy enough ending... THERE'S BETTER NEWS!

Just today whilst visiting the China Town Street Festival, the Ma and I decided to share a bubble tea. We stopped at a place in the mall that seemed to be bustling with activity - often a good sign . The shop was called Pearl House and it specialized in only serving up Bubble Teas. Their menu board was PACKED with every flavour you could ever want in life! Ma and I were craving mango, so we chose a Mango-Peach combo. Here's where things really get exciting: As I peered over the counter, there were no bins filled with the mysterious powder in sight... Instead what I saw was, GASP, Fresh Fruit!! NO WAY. They make their bubble tea with REAL things! And oh boy, I could totally taste a delicious difference. Ma and I happily marched away, confident that we had stumbled upon a real gem.

Moral of the story is:


If at first you don't succeed... Try bubble tea again.

Aaand:

The Pearl House in the China Town Mall has The Best Bubble Tea. (In my fairly inexperienced opinion)

This one's going in the little black book of Foodie-Fun. (What? You don't have a journal you keep of food related things? Weird...)

Do you like bubble tea? If so, where do you go to get it? What's your flavour preference? 

<3 Lari

Olive Oil and Lime Vinaigrette

Fun Fact about Larissa: I am a salad lover! This is true. Naturally, I am also a lover of making homemade salad dressings. They are so easy, and they keep really well in your fridge. They taste better than store bought, as so many things do.

I could go on and on about how much I love salad! But I will try to refrain. I will say, however, that my love of salad can almost solely be credited to one of my high school art teachers, who always brought salad for lunch. I took inspiration from this, and now nearly everyday I bring salad for lunch! You might think, "Salad everyday? Boring!". But salad is SO versatile that it's almost impossible to get bored of it. I have learned over the years of salad making/eating that you can make a salad of pretty much ANYTHING. I usually just take whatever leftovers we have from dinner to make my salad for lunch the next day. Just add lettuce. Thank you, Miss Field, for keeping me happy, healthy, and never bored during the lunch hour!


This recipe is an Olive Oil and Lime Vinaigrette. It's a pretty simple one that can go well with many many salads. I recently made one with mixed greens + falafel + sliced radishes + sliced carrots + sliced celery + this vinaigrette and it was quite tasty.

Olive Oil and Lime Vinaigrette
Recipe very slightly adapted from My New Roots

  • Juice of 1 lemon
  • Juice of 1 lime
  • 1 garlic clove, minced
  • 1/2 tsp salt
  • 1/2 cup olive oil
  • 2 tbsp maple syrup
  • pinch cayenne pepper
Place all ingredients in a jar and shake it up! Dressing can be kept in a jar in the fridge for a few weeks. The olive oil may solidify from the cold, don't fear! Just let it sit at room temp to warm up a bit before serving again.


Friday, 10 August 2012

Go Canada! Bronze Medal Peach Shortcake

I love olympics!
I also love soccer!
I also love Canada!
And I also love this peach shortcake recipe!


I was so excited when the Canadian Women's Soccer team won bronze, that I did a fist pump into the air. The only problem is that I was running on my treadmill in my low-ceilinged-basement when it happened, and forgot how close to the ceiling I really was. I may have made a small dent... I probably looked like a maniac, laughing and crying with joy as small white plaster ceiling bits showered over me, all whilst still running on the treadmill.


 Their medal winning performance deserved a suitable dessert! It also helped that I had many peaches in my fridge begging to be turned into something glorious. And what a glorious dessert this was!
Butterscotch Assault.
I followed the recipe, and it was divine. The only change I made was to cut the biscuits into maple leaf shapes in celebration of Canada's epic win! I also did not peel the peaches for the peach slices... because I am lazy. Also the red looks pretty. Also, who would want to waste any part of a perfect peach? And the homemade butterscotch sauce just ties everything together wonderfully.

<3 Lari

Thursday, 9 August 2012

Peaches and Peanut Butter Stuffed French Toast

Mmmm... French Toast. One of the best breakfast foods out there. Everybody has "their way" to eat French Toast. I used to be very stuck in "my way", until a dear friend of mine introduced me to A NEW WAY. Gasp.

I grew up eating french toast with nothing but a massive mound of icing sugar plopped on top. No, I can't even say dusted or sprinkled... it was a real life mound or powdery goodness. I can't believe my mother let me put that much sugar on. But it was the best way!
I (obviously) think of French Toast as being a sweet dish, as opposed to savoury. I think that many people do too, however not my Ma. She thinks that French Toast should be savoury, not sweet! How bizzare! How not fun. She puts salt and pepper on her French Toast... which still baffles me to this day.
What baffles me more is that my Pa DOESN'T EVEN LIKE FRENCH TOAST.
Why family?! Why?! At least my brother knows what's up about icing sugar too. Two people have got it right.

Oh yeah, the new way! So, friend tells me his way to eat French Toast is with Peanut Butter and Syrup (Aunt Jemima's brand is ideal). Or, if they're available, PB+Syrup and fresh peaches.
When I first heard this, I thought, eww weird. Then I tried it and life changed forever. Now I have noticed that my powdered sugar policy is a thing of the past, and peanut butter is my new present. Try it, you may just fall in love.

In da pan.
One of my most favourite (in fact, probably my favourite) blogs, A Beautiful Mess, featured a post about Peaches and Cream Stuffed French Toast. This totally made me think "Yes, I do want to make Stuffed French Toast" as it is something I have not yet done. I adapted the recipe to use peanut butter instead of cream cheese because HOLY GOODNESS do I love me some peanut butter. And it being my "New Way" to eat French Toast, it just makes sense.


 Peaches and Peanut Butter Stuffed French Toast
Recipe adapted from A Beautiful Mess
Makes two sandwiches

  • 4 slices french bread
  • 1 egg
  • 1/4 tsp vanilla
  • 1/8 tsp cinnamon
  • 1 tbsp milk
  • 1 peach, sliced
  • peanut butter
  • butter for the pan
In a shallow dish, whisk together egg, vanilla, cinnamon and milk. Heat a pan on medium high heat with a bit of butter in the bottom. Spread peanut butter on one side of two of the bread slices. Dip the non-peanut butter side into the egg mixture, then place in the hot pan eggy-side down. Place peach slices on top of the two slices of bread in the pan. Meanwhile, spread peanut butter on one side of each of the other two slices. Dip the non-peanut butter side in the egg. Place this top slice (eggy-side up this time) atop your peach covered slice in the pan. When the bottom of the sandwich is nicely browned, turn the whole shebang over and cook on the other side.
Serve with more peach slices on top, and a generous drizzle of syrup. YUM in the tum.


What is your way to eat French Toast? Maybe I will discover a new one :)

<3 Lari

Wednesday, 8 August 2012

Wishlist Wednesday

Oh hey it's Wednesday! Here's what I have added to my lengthy wish list:


An ice cream maker attachment for Kitchen Aid Mixers. HECK YES.

This is a pretty big ticket item... but a girl can dream. In the meantime, I shall make homemade ice cream by hand. Which is on my to do list for the next couple of days! I have been thinking about trying to make homemade ice cream for some time now.

And using that to make Homemade Ice Cream Sandwiches... ohhhhh yes please!
(Potential hint for future post??? I hope so.)

Monday, 6 August 2012

The. Best. Waffles. Ever.

There are few things I love more in the world than these.

Yes, this post's title is four words, and also four sentences. I believe that it adds seriousness to the subject. And boy, is it a serious subject. When it comes to waffles in my family, we don't joke around.

I can honestly say that me, along with the rest of my family, and everyone who we have served our waffles to, can all agree that these waffles are THE BEST WAFFLES WE HAVE EVER HAD. Which is why I have some trepidation in sharing our family's recipe... Sometimes you want to keep all the good things to yourself, you know?

But then again, it is technically not OUR recipe, although it kind of feels like it is after making it so many times. This waffle recipe has been around for 18 years, and I have been around for 19 years. I can proudly say that I have been raised on this waffle recipe. It all begins with a Christmas gift from my Aunt to my parents in 1993. The was a book called "Waffles: From Morning to Midnight" and contains a plethora of various waffle recipes. Breakfast waffles, lunch waffles, dinner waffles, savoury snack waffles, and over the top dessert waffles. What a brilliant book.

The sad thing? I only just today discovered that this book contains all of this. You may be thinking, "But Larissa, if this book has been around nearly all your life, how could you not know  it had all those delicious recipes until today?"

WELL. Time for honesty. We started with the first recipe, which is a super simple, quick, easy recipe for basic waffles. No frills or fancy flavours, just your regular fluffy waffles. ABSOLUTELY PERFECT! My family fell in love immediately with the recipe, and since 1993, we have not ventured through the rest of the book and tried any of the other recipes! I hadn't even read them... AND I LOVE READING COOKBOOKS. So that is weird. This means we have only ever made the one recipe from the book. We may have thought about trying something new, but then again, what is the point? We would probably just end up wishing we had made our favourite waffles instead.


Today I sat down with the book, and actually briefly took a look, before I had to run to work, at what else it had to offer. A lot! That is what it had to offer. I found myself very inspired by all these variations on one of my favourite breakfast foods. I love trying new things, and putting spins on old classics. So someday I might actually try one of these other recipes (Pumpkin Pie waffles for autumn? Yes please!). But my family is still hesitant to make anything other than our favies.

Sorry for the extra long rant, but guys! This is waffles we're talking about here! We take our waffles seriously, man.
My family will not order waffles in restaurants, because we like ours more. Is that stubborn? No, it is a simple fact of life.
We had some friends over for brunch one day and made waffles. These friends liked our waffles so much, that they went out a bought a waffle iron the next day, so they could make them too.

They really are that good.


We had said waffles for brunch today! Which is the best start to the day.

So here we go, sharing the best waffle recipe in the world. Use it wisely. Make them often. Have them for breakfast, lunch, dinner. Serve them warm with butter, syrup, and bacon OF COURSE!


I truly hope you like them after I have made all this hype! Otherwise, that was rather anti-climatic. But if I'm confident about anything, it is the wonderfulness of these waffles.

I give all credit of this recipe to our Waffle Book, because we never make any changes to it. 'Tis perfect just the way it is. (And ridiculously simple at that.) The only adaption we make is to double the recipe everytime, because we devour these babies. They also make fine leftovers.

Hope you like these as much as me! :)


Waffles. The Best Ever.
Serves: Not enough. Double it. You'll thank me later.
DRY:
  • 1 cup flour
  • 1 tsp baking powder
  • 1 1/2 tbsp sugar
  • pinch of salt
WET:
  • 2 tbsp melted butter (cooled)
  • 1 cup milk
  • 1 egg
Mix together dry ingredients. In a separate bowl, mix together wet ingredients. Mix the dry with the wet until thoroughly combined. Cook in your waffle iron according to it's instructions... mine usually take about 3 to 3 1/2 minutes to get to golden brown perfection. Just a tiny crisp on the outside, with a fluffy, warm and buttery inside.

Spread with butter and watch it melt. Pour on generous amounts of syrup. And do like I do and crumble bacon bits into every little hole in the waffle so that each bite gets a bit o' bacon.

Perfection.

<3 Lari


Sunday, 5 August 2012

Kettlecorn Bars


My first attempt at making popcorn balls! Which, by the way, didn't really work out so I made popcorn bars. I found out that it does not matter what shape it is, these are so good that I will eat them in whatever form they come. Also, breaking rules makes you feel rebellious.


This summer I had the experience of eating my first popcorn ball. It was underwhelming. Not bad or anything, but it was just so mediocre for something that has such potential! These, however simple they are, live up to that potential.


I have just recently discovered the AWESOMENESS of "Cowboy Popcorn"'s Kettlecorn which is a rare treat as they only have booths that pop up at certain festivals. Lucky for me, they had a booth at Folk Fest this year and I took full advantage! I bought the biggest bag I could and ate nearly all of it that night. AND IT WAS SO GRAND. However I showed some restraint and took some leftovers home with me. Thinking about my leftover kettlecorn... and also thinking of my leftover homemade marshmallows sitting on my counter that needed to be eaten...

I made these beauties! Using kettlecorn and home-made marshmallows really upped the anti (what does that even mean?) on these popcorn bars. I understand however that not everyone, including me, may have kettlecorn and home-made marshmallows just chillin waiting to be used up all the time. But the good news is that you can make these with any popcorn, and any marshmallows. Actually, you don't even have to use popcorn. You could use cereal! The classic and obvious choice would be Rice Krispies... but thinking outside the Rice Krispies box I have been dreaming up some different bars/square recipes to try someday:
Reese's cereal, CocoPuff cereal... heck any puffed cereal would be delish. But back to the real deal...


Kettlecorn! These are super fast and easy to make. So no excuses. If you are feeling fancy, throwing in some chocolates or nuts would probably be nothing short of scrumptious. Mix it up!

Kettlecorn Bars
  • 3 tbsp butter
  • 10 oz marshmallows
  • 6 cups kettle corn
Avec Microwave: In a large microwave friendly dish, place the butter and marshmallows. Microwave until the marshmallows have melted (mine took about 30 seconds) and stir to combine the marshmallows with the butter.

Sans Microwave: Combine the marshmallows and butter in a large pot and let them melt together over medium low heat.

Next, add in your kettlecorn. Or Rice Krispies. Or Reese's cereal. Or whatever you happen to have on hand.

Pretty simple huh? 

Just press your mixture into a pan lined with parchment (these bad boys are seriously sticky before they are set, just a warning). Pop them in the fridge to set up, cut into bars and share with your family and friends.

<3 Lari


5 Things of Awesome. Pinterest Edition

Welcome to The Pinterest Edition of 5 Things of Awesome. Here is what I think is awesome this week, as seen on Pinterest:


The cutest serving dish ever! From ModCloth, of course.

Salad, served in avocado halves. Brilliant.

Kids Coffee Shop Playhouse... ADORABLE

This cute decor, in which I want all over my future home.

A pretty display table with pastel pallet 
<3 Lari

Boozy Berries and a Flambe Fail

Have you ever made something that you weren't quite sure how good it would turn out, but you make it anyways, AND IT'S ACTUALLY AMAZING? This is one of those things.
Even while I was in the process of cooking this yummy ice cream topping, I was not so sure what the end result would be like. Our tale begins with Food Network, as so many do.
Once Upon a time (a month or so ago), I discovered a competition on Foodnetwork.ca called "Anna Olson's Bake Off". I am an Anna Olson fan! Because she too is a baker and a lover of dessert. Anybody who has those qualities is pretty much an instant friend of mine. I have been known to wake up a little earlier than I really need to in the mornings, just so I can watch Food Network while I eat my breakfast. "Bake with Anna Olson" is one of my favourite shows to watch, so when I discovered this contest of hers... I obviously HAD to try it out!
The contest goes like this: on the 15th of every month, Anna starts a new challenge where she sends out a recipe of hers for home cooks to try their hand at. You can follow the recipe, or add your own creative spin on it. Then all you have to do is take a photo of your creation, and email it to her with a little descriptive blurb. You have one month to complete the challenge, then Anna picks a winner from submissions and the winner gets sweet Foodie-Related-Prizes! Oh and even cooler, Anna posts ALL of the submission on food network.ca so everyone feels like a winner in the end. How awesome, is that. (Check out my first entry along with the others here!)

Anywho, this is what the challenge was for July/August: Snickerdoodle Cookies with Berries Jubilee. The Berries Jubilee is a fancy ice cream topping that you FLAMBE! (that would be the "challenge" part of the bake off...)
I have never Flambéed before...
I was nervous.
BUT ALSO REALLY EXCITED to see giant flames in my kitchen (That I put there on purpose)
I tried it, with caution!
Nothing happened.
I tried it without any caution at all!
I eventually got the smallest, wimpiest flame of life that fizzled away back to nothing immediately.
In the whole process of this, I added about double the amount of alcohol that the recipe is supposed to contain...
All this led to my doubts of how this was going to turn out. 


Luckily, it turned out like THIS! And was probably one of the better things I have ever made. I have submitted my Bake Off entry with pride, and even if I do not win the contest, I am a real winner here anyways because I now have an awesome ice cream topping recipe... and an excuse to try Flambee-ing once more. (Because even though the flame was small, it was a thrilling experience like no other. It feels rebellious... Muahaha)
I made Chocolate Sauce, Berries Avec Alcohol and Berries Sans Alcohol. Something for everyone. For me: Boozy Berries + Chocolate = Love on ice cream.

Boozy Berries Ice Cream Topping
Original Recipe from Anna Olson
  • 3 cups mixed berries (fresh, or thawed frozen) I used 1 cup of blueberries, 1 cup of strawberries and 1 cup of raspberries
  • 1/4 cup sugar
  • 1 tbsp lemon juice
  • 1/3 cup raspberry jam
  • 3 tbsp Brandy (if you wish to make a non-boozy berry sauce, use orange juice instead)
  • 1 tsp vanilla
In a large sauté pan over medium high heat, stir berries and sugar until sugar is dissolved. Add the lemon juice and raspberry jam and stir to incorporate. Carefully pour the brandy in using a ladle to avoid splashing and unwanted flames. Now is the fun part, or the rather anti-climatic part, depending on your flambé abilities. You can either tilt the pan toward the flame to ignite the alcohol, or use a long handled BBQ lighter. If you are luckier than I, watch your berries flame away! And wait for the flames to subside. Turn off the heat, stir in the vanilla, and store sauce in a jar in the fridge.

Serve on vanilla ice cream and share with your neighbours. 
*NOTE* it is truly delish when the berries are still a tad warm, and you also serve it with warmed chocolate sauce. =) We have a winner folks.

<3 Lari