Showing posts with label raspberry. Show all posts

Sunday, 11 August 2013

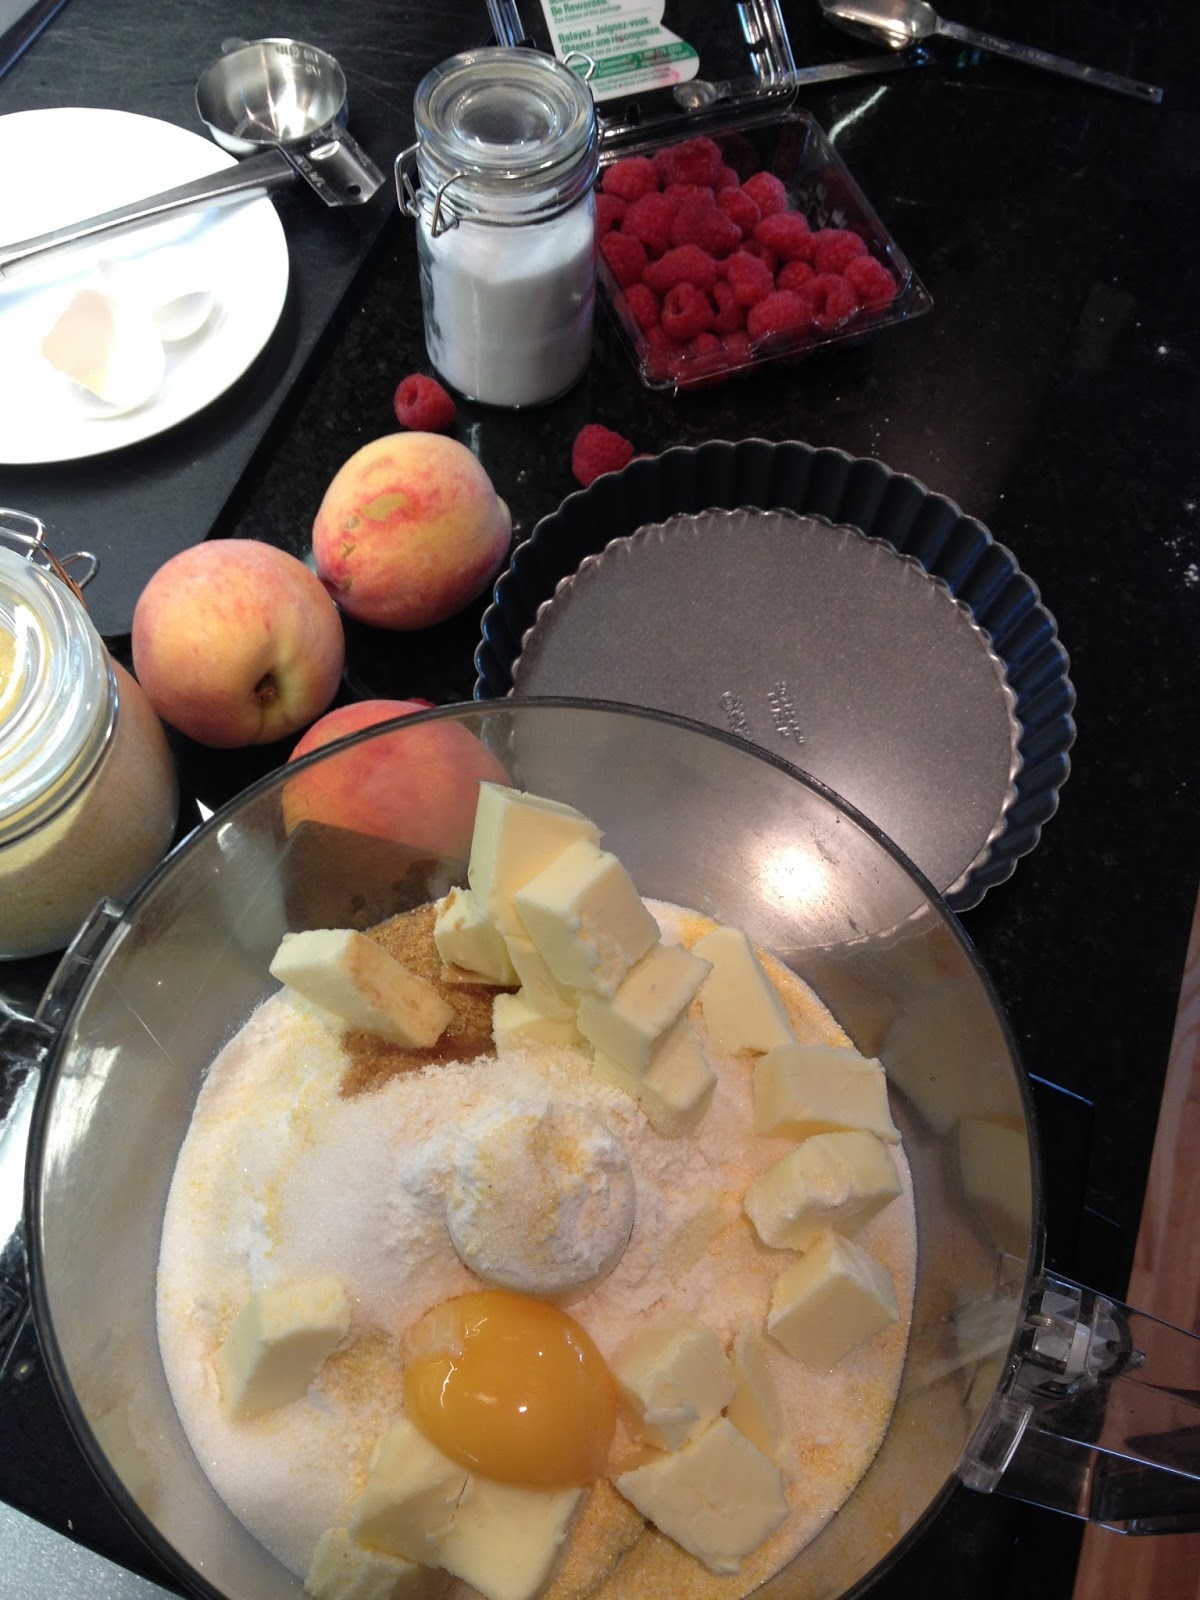
Peach-Raspberry Tart with Cornmeal Crust


Fun Fact Number 1: August 11 happens to be National Raspberry Tart Day in the United States. 
Fun Fact Number 2: I was planning on making a peach and raspberry tart on August 11 ANYWAYS!

Don't you love it when life just lines up like that? But please do not feel that you must wait for an irrational National Food Holiday to bake a delicious summer fruit tart. You should do it just because you want to. And because you have a bounty of ripe fruit begging to be eaten! Like that is a problem.


I love summer for all of the fresh fruit! It seems like there is so much of it around and it tastes SO MUCH BETTER when it's in season. I want all the fruits. I made this tart with just peaches and raspberries but you could really use whatever fruit you have on hand. Apricots, nectarines, strawberries, blueberries, blackberries, pitted cherries... You could use a combination of fruits or just one fruit...choose your own fruity adventure.


The crust has cornmeal in it, woah! It pairs nicely with the summery fruit and adds a little crunch in texture. Not feeling the cornmeal? You can replace it and just use all flour. But cornmeal is kind of exciting! Is my life that boring that I get excited about cornmeal? No, I'm gonna go with cornmeal is really exciting. What? You are not excited about cornmeal? Weird.

PS This was my first debut of my NEW TART PAN SET WITH REMOVABLE BOTTOMS which I have been dying to use since I got them as a gift like 6 months ago... finally! It feels darn good. Let there be TARTS! I can also sense a quiche in my future... my pie senses tell me. And my pie senses are quite keen these days...
Peach-Raspberry Tart with Cornmeal Crust
Recipe barely adapted from Martha Stewart

Crust:
  • 3/4 cup all purpose flour
  • 1/2 cup corn meal
  • 3 tbsp. granulated sugar
  • 1 egg yolk
  • 3.5 oz butter (7 tbsp.) cut into cubes
  • 1/2 tsp vanilla extract
Filling:
  • 3 peaches cut into slices
  • 3/4 cup fresh raspberries
  • 2 tbsp. brown sugar
  • 2 tbsp. granulated sugar
  • 1 scant tbsp. turbinado sugar for sprinkling

Directions:
  1. Place all the ingredients for the crust into a food processor and whiz it up! Doesn't get much easier than that. Dump the mixture into an ungreased 8 inch tart pan with removable bottom. (If you don't have a tart pan you can also use an 8 inch springform pan. Press the crust mixture evenly into the pan and up the sides. Place the tart pan onto a rimmed baking sheet. Bake the crust at 400F for about 15 minutes until it is puffed and slightly golden. Remove the crust from the oven and press it down with an offset spatula. Reduce the oven temperature to 375F
  2. In a medium bowl, toss together the peach slices, raspberries, brown and granulated sugar.
  3. Pour the fruit filling mixture into the partially baked crust and sprinkle the top with some turbinado sugar. Place back in the oven to bake for another 30-35 minutes, or until fruit is tender and bubbly and the edge of the crust is golden brown.
  4. Remove from the oven and move tart pan to a wire rack to cool.
  5. Serve warm or at room temperature and VANILLA ICE CREAM :) (obviously)
Enjoy!

<3 Lari

Tuesday, 6 August 2013

Lemon Raspberry Yellow Rose Cake


I love having an excuse to make a fancy cake! Especially when it is for somebody special. And especially when it is a surprise for them. Surprises are always the best.

This particular cake was for my Aunt Joan. I have three aunts in total, and two of them are named Joan. How does that happen? THIS Aunt Joan is from my Dad's side of the family and her birthday just happened and I totally got to make a cake for her! I had a massive brainstorming session for what kind of cake I wanted to make, and how to decorate it. All free time was dedicated to cake thoughts.

I wanted to make it special for her, so I asked around the family for some inspiration. Turns out, she has a thing for roses, yellow roses in particular. BAM! Inspiration. And the Yellow Rose Aunt Joan Cake is born.


This cake was to be served after a family dinner, in the summertime... so I wanted it to be light and summery, not too rich. Also, YELLOW! (After much indecision and debate) I decided to create something lemony and raspberry-y. Seemed like the right thing to do. And when in doubt, cream cheese frosting.


Lemon and raspberries feel like summer! Yellow and white with a splash of pink makes me happy.

I seriously had a lot of fun making this cake, from designing it, to baking, to decorating... Give me an occasion. I'll make you a cake. Please? Cool, thanks. Let's be friends.


Lemon Buttermilk Cake
Recipe from Martha Stewart

  • 3 cups all purpose flour
  • 1 tbsp baking powder
  • 1/2 tsp salt
  • 1 cup (8 oz.) butter
  • 2 cups granulated sugar
  • 4 eggs
  • zest of 3 lemons (about 3 tbsp)
  • 2 Tbsp lemon juice (about 1 lemon)
  • 1 tsp vanilla
  • 1 cup buttermilk
1) In a medium bowl, sift together the flour, baking powder and salt. Set aside.
2)Using an electric mixer, cream together the butter and sugar until light and fluffy. Add the eggs one at a time, scraping the sides of the bowl as needed. Blend in the lemon zest and vanilla.
3)Add the flour mixture in three additions, alternating with two additions of buttermilk and lemon juice. Blend until just combined.
4)Pour batter into greased and floured 8" cake tins. (I saved some batter to make into mini cupcakes... you know, for mandatory taste-testing and quality control)
5)Bake at 325 for about 30 minutes or until cake tops are springy and a toothpick inserted comes out clean.
*If you are making mini cupcakes, they will take about 15 minutes.
*If you are making regular sized cupcakes, they will take about 20 minutes.
6)Let cakes cool at least 10 minutes in the pan, then turn out onto wire racks to cool completely before frosting.
*Cakes can be stored in an airtight container at room temperature for one day, or wrapped in plastic and frozen for much longer!


Cream Cheese Frosting


  • 8 oz cream cheese
  • 2 oz butter
  • 4 cups sifted icing sugar (you may need more depending on the temperature, my frosting was too soft so I added 1/4 cup extra)
  • pinch salt
  • 1 tsp vanilla extract
1) In a mixer bowl, cream together the butter and cream cheese until fluffy and completely combined. Gradually add the icing sugar about one cup at a time, beating until well combined after each addition. Beat in the salt and vanilla extract. Taste and adjust as needed. If frosting is too thin, add more icing sugar. Too thick? Add a tiny splash of milk.

Frosting can be used immediately  or refrigerated in an airtight container for a few days, or frozen for up to three months.


For the filling of the cake, all I did was take about 1/3 of the cream cheese frosting and added a big handful of fresh raspberries and mashed it all up. I didn't blend it together completely because I was going for the marbled look. Pretty!

(A warning note: the raspberries I added were particularily delicious i.e. JUICY like mad and thinned out the frosting quite a bit. This made things a bit runny and messy and oozing-out-the-sides style when I layered the cake. Perhaps next time I will add more powdered sugar to help thicken it up. Once you put the first layer of frosting on the outside, however, if you stick the cake in the fridge it will firm up and help things along.)


My first rose, woo!

Meringue Buttercream Roses
Recipe from Martha Stewart


  • 3 egg whites
  • 1/2 cup plus 1 tbsp sugar
  • pinch salt
  • 1 cup (8oz) butter at room temperature
  • 3/4 tsp vanilla extract
  • Gel paste food colouring (I used a mixture or golden yellow and lemon yellow by Wilton)
1)In the heatproof bowl of a standing mixer whisk together the egg whites, sugar and salt. Set the bowl over a pan of simmering water and whisk constantly until the sugar has dissolved, about 2-3 minutes, the mixture should feel smooth when you rub it between your fingers. 

2) Once the sugar has dissolved, remove the bowl from the heat and attatch it to your standing mixer. Starting on low speed and increasing to medium high, whip the egg white mixture until it is completely cool, white and glossy and forming slightly stiff peaks. (this takes about 10 minutes)

3) Reduce speed to medium low and add the softened butter one tablespoon at a time, beating until combined after each addition. If the mixture appears to "curdle" after adding the butter, FEAR NOT! This happens to me every. time.  :( But the good news is all you have to do is keep beating, and whip that buttercream back into shape. Just beat it. Like Michael Jackson told you to.

4) Next mix in the vanilla extract and food colouring if desired. YELLOW!

5) You can use the buttercream immediately, or keep it in an airtight container in the fridge for a few days, or in the freezer for up to 3 months. Just bring back to room temperature and beat it some more to get the right consistency.

6) When you're ready to make the roses, fit a pastry bag with a petal tip, then fill the bag with your buttercream. You will also need 1 inch squares of parchment paper, a flower nail and an offset spatula is helpful when moving the flowers from the parchment to the cake.

7) I would reccommend watching a few youtube videos for a visual on how to pipe these flowers. They look complicated, but I found them to be quite simple. The petal tip does most of the work for you! And as always, Martha knows what's best: check out her instructions here. (I just used the petal tip, instead of switching back and forth between two and it worked out fine)

Cake Assembly

1) Place one cake layer on the platter you wish to serve it on. Spread with a thin layer of raspberry jam.

2)Spread the raspberry-marbled cream cheese frosting on top of the jam, no need to spread too far to the edges because it will ooze out otherwise when you put the next layer on.

3)Put the next layer on!

4)Spread a thin layer of cream cheese frosting over the top and sides of the cake, working fairly quickly because oh my goodness this frosting is oozing out the sides and turning my white frosting pinkish and hey maybe that's still cool it's kind of looking like ombre and that's totally in right now maybe I'll just let it happen! But please get a coat of cream cheese frosting on there, pop it in the fridge for at least 1 hour to firm up a bit. I left mine in the fridge overnight, and left the rest of the decorating for the next day which was the day of the party.


5) Using an offset spatula, transfer your buttercream roses from their parchment squares to the top of the cake, arranging how you like.
I had some leftover cream cheese frosting, so I tinted it green and piped some leaves around the roses.

6)Finish the cake off by arranging fresh raspberries around the bottom and TADAA


Slice it, serve with vanilla ice cream, on the patio in the backyard. Rock on.


<3 Lari


Monday, 22 July 2013

PB and J Cupcakes


I am not quite sure how to get this across, but I am seriously in love with Peanut Butter and Jam. Like, a lot. A LOT A LOT.
Whenever I see PB and J anything, I am all over it. It is the epitome of childhood comfort food! I love PB and J so much... I made it a starring role in one of my final projects in college this past year. Homework can't get much cooler than that, am I right?

The best part was that our class was having a potluck on our last day of school. I think potluck is one of my favourite words, because it means: I get to cook something! And I knew that whatever I made had to match my PB and J project that I was handing in, obviously. Matching your projects is very important.


It has been a while since we had this potluck... but it's never to late for a little PB & J I always say.

I had seen this recipe in this book a long time ago, and had filed it away in my "To Bake" list in my head (a list that forever grows longer and longer). And what better time to bake a batch of Peanut Butter and Jam cupcakes? No better time! Well, to be honest, it is hard to find a bad time to make these. They are darn cute, and ever so tasty. I might even have to say they taste better than they look. Which is perfectly okay with me.

Here are some pictures of my final project I created: A PB and J Recipe Book! (That is actually a pillow. Yes, Art School is the best.)


Pillow book!

Opens up...

Instructions, illustrated. To make simple things even simpler.


Peanut Butter and Jam. The best love story I know!


PB and J Cupcakes
Recipe adapted from Martha Stewart

Some notes: Depending on your preference/what happens to be in the fridge at the time, you could use sour cream in place of the greek yogurt. I did not have any roasted peanuts on hand, but if you do, chop them up and fold them in at then end for a lovely crunch! My favourite peanut butter is the all natural chunky kind, so this is what I used. But you could really use whatever you like or have on hand!

You will need:
  • 1 3/4 cups flour
  • 1/4 tsp baking soda
  • 3/4 tsp baking powder
  • 1/2 tsp salt
  • 3/4 cup butter
  • 1 1/3 cups sugar
  • 2/3 cup chunky natural peanut butter
  • 3 eggs
  • 1/2 tsp vanilla
  • 1/2 cup greek yogurt
Sift together the flour, baking soda, baking powder and salt, set aside. In the bowl of a standing mixer, cream together the butter and the sugar. Mix in the peanut butter until fluffy. Add the eggs, one at a time, scraping down the sides of the bowl as needed just until everything is incorporated. Mix in the vanilla. Gradually add in the flour mixture until just combined. Stir in the greek yogurt.

Divide the batter evenly among paper lined muffin tins, and bake at 375 for 20-22 minutes if you are making regular sized cupcakes, or for 13-15 minutes if you are making mini cupcakes.
Cool completely before frosting with Peanut Butter Frosting!

For the Frosting:
  • 6 ounces cream cheese
  • 1/3 cup powdered sugar
  • 1/2 tsp salt
  • 1 cup creamy peanut butter
  • 1/2 tsp vanilla
  • 1/2 cup heavy cream
Cream the cream cheese together with the sugar until pale and fluffy. Add the salt and the peanut butter and beat to combine. Mix in the vanilla.

In a separate bowl, whisk the cream to medium peaks, then the the whipped cream into the peanut butter mixture.

Notes for the Frosting: Although I mentioned for the cupcake batter that you could use whatever peanut butter you desired, I feel fairly strongly that this frosting really requires the peanut butter to be of a creamy nature, not chunky. Unless of course you like the funk. Using creamy peanut butter makes this into the silkiest peanut butter frosting... just when you thought peanut butter couldn't get any more delicious and addictive... Sorry.

Assembly time!

Fill a pastry bag fitted with a star tip with the creamy frosting, and pipe a pretty swirl atop each cooled cupcake. Make a small indent in the top of the swirl where the raspberry jam will sit. I found this easiest to do by dipping my finger in a little water before each one, then the frosting doesn't stick to your finger. Using a small spoon, scoop a little raspberry jam and dollop on the tops of each cupcake. 
Now you have a load of delicious and creamy peanut butter cupcakes, adorned with a sparkling ruby of raspberry jam.
It's all the wonders of childhood... but better... and with more sugar :)


Happy PB and J - ing!

<3 Lari


Sunday, 5 August 2012

Boozy Berries and a Flambe Fail

Have you ever made something that you weren't quite sure how good it would turn out, but you make it anyways, AND IT'S ACTUALLY AMAZING? This is one of those things.
Even while I was in the process of cooking this yummy ice cream topping, I was not so sure what the end result would be like. Our tale begins with Food Network, as so many do.
Once Upon a time (a month or so ago), I discovered a competition on Foodnetwork.ca called "Anna Olson's Bake Off". I am an Anna Olson fan! Because she too is a baker and a lover of dessert. Anybody who has those qualities is pretty much an instant friend of mine. I have been known to wake up a little earlier than I really need to in the mornings, just so I can watch Food Network while I eat my breakfast. "Bake with Anna Olson" is one of my favourite shows to watch, so when I discovered this contest of hers... I obviously HAD to try it out!
The contest goes like this: on the 15th of every month, Anna starts a new challenge where she sends out a recipe of hers for home cooks to try their hand at. You can follow the recipe, or add your own creative spin on it. Then all you have to do is take a photo of your creation, and email it to her with a little descriptive blurb. You have one month to complete the challenge, then Anna picks a winner from submissions and the winner gets sweet Foodie-Related-Prizes! Oh and even cooler, Anna posts ALL of the submission on food network.ca so everyone feels like a winner in the end. How awesome, is that. (Check out my first entry along with the others here!)

Anywho, this is what the challenge was for July/August: Snickerdoodle Cookies with Berries Jubilee. The Berries Jubilee is a fancy ice cream topping that you FLAMBE! (that would be the "challenge" part of the bake off...)
I have never Flambéed before...
I was nervous.
BUT ALSO REALLY EXCITED to see giant flames in my kitchen (That I put there on purpose)
I tried it, with caution!
Nothing happened.
I tried it without any caution at all!
I eventually got the smallest, wimpiest flame of life that fizzled away back to nothing immediately.
In the whole process of this, I added about double the amount of alcohol that the recipe is supposed to contain...
All this led to my doubts of how this was going to turn out. 


Luckily, it turned out like THIS! And was probably one of the better things I have ever made. I have submitted my Bake Off entry with pride, and even if I do not win the contest, I am a real winner here anyways because I now have an awesome ice cream topping recipe... and an excuse to try Flambee-ing once more. (Because even though the flame was small, it was a thrilling experience like no other. It feels rebellious... Muahaha)
I made Chocolate Sauce, Berries Avec Alcohol and Berries Sans Alcohol. Something for everyone. For me: Boozy Berries + Chocolate = Love on ice cream.

Boozy Berries Ice Cream Topping
Original Recipe from Anna Olson
  • 3 cups mixed berries (fresh, or thawed frozen) I used 1 cup of blueberries, 1 cup of strawberries and 1 cup of raspberries
  • 1/4 cup sugar
  • 1 tbsp lemon juice
  • 1/3 cup raspberry jam
  • 3 tbsp Brandy (if you wish to make a non-boozy berry sauce, use orange juice instead)
  • 1 tsp vanilla
In a large sauté pan over medium high heat, stir berries and sugar until sugar is dissolved. Add the lemon juice and raspberry jam and stir to incorporate. Carefully pour the brandy in using a ladle to avoid splashing and unwanted flames. Now is the fun part, or the rather anti-climatic part, depending on your flambé abilities. You can either tilt the pan toward the flame to ignite the alcohol, or use a long handled BBQ lighter. If you are luckier than I, watch your berries flame away! And wait for the flames to subside. Turn off the heat, stir in the vanilla, and store sauce in a jar in the fridge.

Serve on vanilla ice cream and share with your neighbours. 
*NOTE* it is truly delish when the berries are still a tad warm, and you also serve it with warmed chocolate sauce. =) We have a winner folks.

<3 Lari