Showing posts with label summer. Show all posts

Sunday, 17 August 2014

Smore Cupcakes


These are my new favourite cupcakes!!!

I love taking two different desserts, mashing them together to create one bundle of awesome. In this case, the classic campfire treat of Smores is the theme, but it takes shape in form of a cupcake.

Also, any opportunity to use a blow torch in the kitchen is one that should be jumped upon. The potential of lighting cupcake papers on fire is real... and thrilling.


MUCH CUTENESS!

Graham flour and honey flavour the cake part of these cupcakes, reminding us of graham crackers. A semi-sweet chocolate ganache is spooned over, and a marshmallow frosting is whipped together in no time at all to sit all cute and pretty on the very top.

As if that were not enough to achieve the ultimate crowd pleaser, the marshmallow frosting is TOASTED! We are bringing the campfire to our kitchen, people. It feels so great!

 Serve these cuties at a party outdoors on a summer evening, preferably with patio lights and good music. They are serious friend makers. Trust me, I speak from experience.

Smore Cupcakes
Recipe from Martha Stewart (Gotta love her, or at least her cupcakes)

1 1/2 cups all purpose flour
1 1/3 cups graham flour (found it at Community Natural Foods, Bob’s Red Mill brand)
2 tsp baking powder
1 1/2 tsp salt
1 1/2 tsp ground cinnamon
1 1/4 cups (10 ounces) butter
2 cups brown sugar
1/4 cup honey
6 eggs
2 tsp vanilla

Whisk together both flours, baking powder, salt and cinnamon. In another bowl using an electric mixer, beat butter and sugar until fluffy. Beat in honey, then eggs, one at a time. Beat in vanilla. Gradually incorporate the dry ingredients on low speed.
Divide batter into muffin tins... I used mini muffin tins.
Bake at 350 (325 for our oven). I baked the minis for 15 minutes. The original recipe for regular sized cupcakes calls for 25 minutes.

Made about 4.5 dozen mini cupcakes. (recipe makes regular sized cupcakes and claims to yield 2 dozen)

Chocolate Ganache Glaze:

6 ounces semisweet chocolate, chopped (I did 5 oz semisweet, 1 oz bittersweet... because I love me some bittersweet)
2/3 cup heavy cream
1 tbsp corn syrup

Place the chopped chocolate in a heatproof bowl. In a small saucepan, heat the cream and syrup until steamy and hot, but not boiling!
Pour the hot cream over the chocolate and let sit for 5 or so minutes. Stir slowly with a spatula to gradually combine the two until you have a silky smooth ganache!


Marshmallow Frosting

1 tbsp powdered gelatin
1/3 cup cold water (for gelatin)
1/4 cup water (for pot)
1 cup sugar

In the bowl of a standing mixer, sprinkle the gelatin over the 1/3 cup cold water. Let stand to soften. (about 5 minutes)
Heat the remaining 1/4 cup water with the sugar in a small saucepan over medium heat. Stir to dissolve sugar. Once the sugar has dissolved, stop stirring. Clip a candy thermometer to the side of the pot. Let the sugar bubble and boil until the temperature reaches 238 degrees F - “soft-ball” stage. Remove from the heat, and add to gelatin mixture. Whisk by hand for about one minute to cool slightly. Then use the standing mixer with the whisk attachment and whisk on medium high speed for 8-10 minutes until  soft, glossy white peaks form. Use immediately, as the frosting begins to harden and set quickly.

Cupcake assembly:
 For mini cupcakes, spread about 1 tsp ganache glaze over the tops. Pipe marshmallow frosting with a plain round tip. Use a kitchen torch to lightly toast the frosting... just like a marshmallow!!!


HOLY MOLY! These cupcakes are WINNNNERRRSSSS!!

XOXO Lari


Tuesday, 5 August 2014

Hazelnut Gelato

OH MY GOODNESS I GOT AN ICE CREAM MAKER LET THE GAMES BEGIN!


I have only been dreaming of owning my own ice cream machine for years... and now I am finally the proud owner of one! I got this model, and I have used it once. And so far I LOVE IT!


ICE CREAM FOR DAYS!

I can't wait to make 198359283745987 different flavours and make homemade ice cream sandwiches... I have quite the line up of bookmarked pages of things to try including this, this and THIS!

My first flavour with this new baby is Hazelnut Gelato, absolutely inspired by my recent trip to Italy. My favourite gelato flavours in Italy were usually hazelnut or coffee. You best believe I will be trying coffee ice cream out soon soon soooooon!

OMG MY FIRST SCOOP.


Ice cream takes patience, love and whole milk :)
I am willing to spare all of these.


Hazelnut Gelato
Recipe from Rocco DiSpirito

Note: This recipe only makes a very small amount... but I thought that was okay for my first batch! Plus I know I will be wanting to try out other flavours like IMMEDIATELY.

This recipe tasted good, although I must admit that it seemed to take a lot of effort and produce not very much. But I am far too excited not to share my first creation!! MANY MORE TO COME :)

4 ounces hazelnuts, toasted and skinned (a little bit of skin left on is okay. for my standards at least!)
1 1/4 cups whole milk
2 egg yolks
2 tbsp granulated sugar

In a food processor, whiz up the hazelnuts to fine crumbs and then keep on processing until they turn into a paste. You just made hazelnut butter! What what!
In a small saucepan over medium heat, heat the milk until hot and small bubbles form around the outside, but not boiling. Remove from the heat and stir in the hazelnut paste until thouroghly combined. Set mixture aside and allow to cool completely.

Once cool, strain through a fine mesh strainer. Wash out the strainer, discarding any solids. Strain the mixture again, but this time line the strainer with a double layer of cheesecloth to make the mixture even smoother.

In another bowl, whisk egg yolks and sugar until foamy. Whisking constantly, slowly pour in the hazelnut-milk, a little at a time, until completely combined. Place the custard mixture over a pot of simmering water. Whisk constantly over medium heat for about 4 minutes, until the mixture is thick enough to coat the back of a spoon. Let the mixture cool completely, and cool it in the fridge for at least a few hours until it is really cold. (this will speed up the churning process)

Follow the instructions on your ice cream machine... and voila! Homemade Hazelnut Gelato! YOU'RE A WIZARD!


XOXO
Lari 

Sunday, 11 August 2013

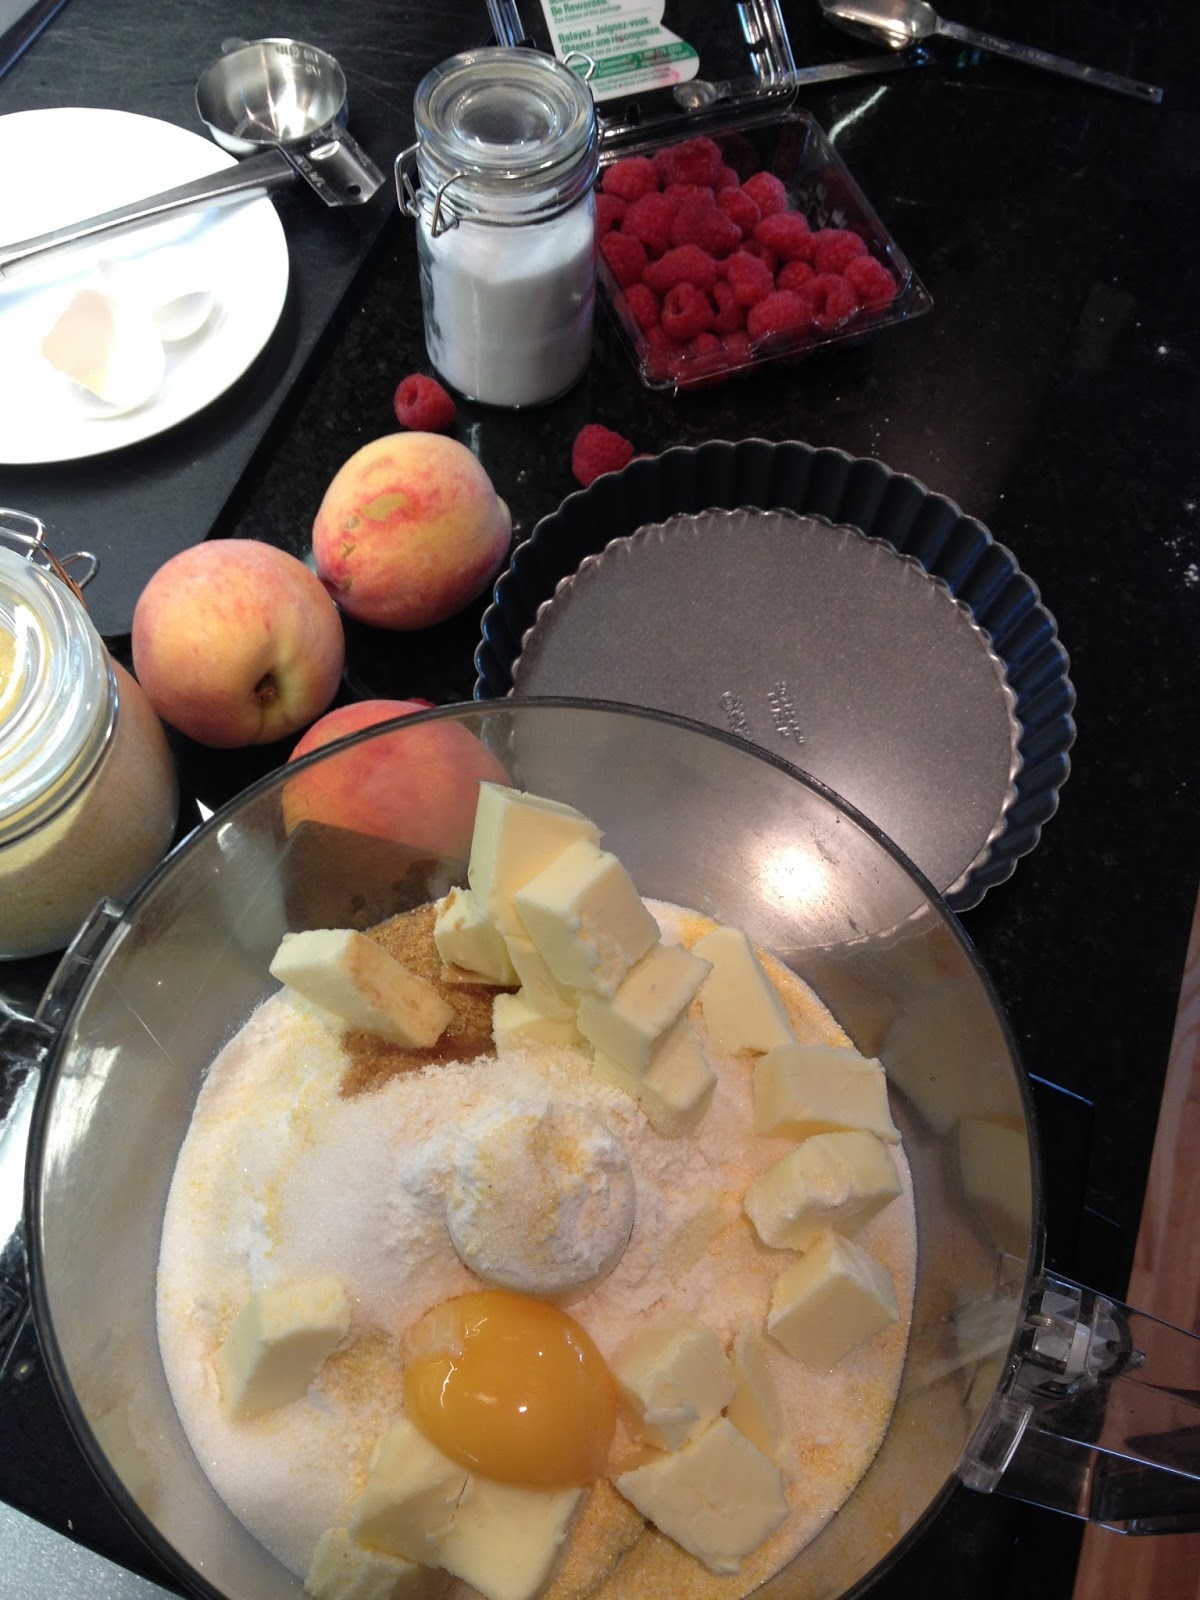
Peach-Raspberry Tart with Cornmeal Crust


Fun Fact Number 1: August 11 happens to be National Raspberry Tart Day in the United States. 
Fun Fact Number 2: I was planning on making a peach and raspberry tart on August 11 ANYWAYS!

Don't you love it when life just lines up like that? But please do not feel that you must wait for an irrational National Food Holiday to bake a delicious summer fruit tart. You should do it just because you want to. And because you have a bounty of ripe fruit begging to be eaten! Like that is a problem.


I love summer for all of the fresh fruit! It seems like there is so much of it around and it tastes SO MUCH BETTER when it's in season. I want all the fruits. I made this tart with just peaches and raspberries but you could really use whatever fruit you have on hand. Apricots, nectarines, strawberries, blueberries, blackberries, pitted cherries... You could use a combination of fruits or just one fruit...choose your own fruity adventure.


The crust has cornmeal in it, woah! It pairs nicely with the summery fruit and adds a little crunch in texture. Not feeling the cornmeal? You can replace it and just use all flour. But cornmeal is kind of exciting! Is my life that boring that I get excited about cornmeal? No, I'm gonna go with cornmeal is really exciting. What? You are not excited about cornmeal? Weird.

PS This was my first debut of my NEW TART PAN SET WITH REMOVABLE BOTTOMS which I have been dying to use since I got them as a gift like 6 months ago... finally! It feels darn good. Let there be TARTS! I can also sense a quiche in my future... my pie senses tell me. And my pie senses are quite keen these days...

Peach-Raspberry Tart with Cornmeal Crust
Recipe barely adapted from Martha Stewart

Crust:
  • 3/4 cup all purpose flour
  • 1/2 cup corn meal
  • 3 tbsp. granulated sugar
  • 1 egg yolk
  • 3.5 oz butter (7 tbsp.) cut into cubes
  • 1/2 tsp vanilla extract
Filling:
  • 3 peaches cut into slices
  • 3/4 cup fresh raspberries
  • 2 tbsp. brown sugar
  • 2 tbsp. granulated sugar
  • 1 scant tbsp. turbinado sugar for sprinkling

Directions:
  1. Place all the ingredients for the crust into a food processor and whiz it up! Doesn't get much easier than that. Dump the mixture into an ungreased 8 inch tart pan with removable bottom. (If you don't have a tart pan you can also use an 8 inch springform pan. Press the crust mixture evenly into the pan and up the sides. Place the tart pan onto a rimmed baking sheet. Bake the crust at 400F for about 15 minutes until it is puffed and slightly golden. Remove the crust from the oven and press it down with an offset spatula. Reduce the oven temperature to 375F
  2. In a medium bowl, toss together the peach slices, raspberries, brown and granulated sugar.
  3. Pour the fruit filling mixture into the partially baked crust and sprinkle the top with some turbinado sugar. Place back in the oven to bake for another 30-35 minutes, or until fruit is tender and bubbly and the edge of the crust is golden brown.
  4. Remove from the oven and move tart pan to a wire rack to cool.
  5. Serve warm or at room temperature and VANILLA ICE CREAM :) (obviously)
Enjoy!

<3 Lari

Tuesday, 6 August 2013

Lemon Raspberry Yellow Rose Cake


I love having an excuse to make a fancy cake! Especially when it is for somebody special. And especially when it is a surprise for them. Surprises are always the best.

This particular cake was for my Aunt Joan. I have three aunts in total, and two of them are named Joan. How does that happen? THIS Aunt Joan is from my Dad's side of the family and her birthday just happened and I totally got to make a cake for her! I had a massive brainstorming session for what kind of cake I wanted to make, and how to decorate it. All free time was dedicated to cake thoughts.

I wanted to make it special for her, so I asked around the family for some inspiration. Turns out, she has a thing for roses, yellow roses in particular. BAM! Inspiration. And the Yellow Rose Aunt Joan Cake is born.


This cake was to be served after a family dinner, in the summertime... so I wanted it to be light and summery, not too rich. Also, YELLOW! (After much indecision and debate) I decided to create something lemony and raspberry-y. Seemed like the right thing to do. And when in doubt, cream cheese frosting.


Lemon and raspberries feel like summer! Yellow and white with a splash of pink makes me happy.

I seriously had a lot of fun making this cake, from designing it, to baking, to decorating... Give me an occasion. I'll make you a cake. Please? Cool, thanks. Let's be friends.


Lemon Buttermilk Cake
Recipe from Martha Stewart

  • 3 cups all purpose flour
  • 1 tbsp baking powder
  • 1/2 tsp salt
  • 1 cup (8 oz.) butter
  • 2 cups granulated sugar
  • 4 eggs
  • zest of 3 lemons (about 3 tbsp)
  • 2 Tbsp lemon juice (about 1 lemon)
  • 1 tsp vanilla
  • 1 cup buttermilk
1) In a medium bowl, sift together the flour, baking powder and salt. Set aside.
2)Using an electric mixer, cream together the butter and sugar until light and fluffy. Add the eggs one at a time, scraping the sides of the bowl as needed. Blend in the lemon zest and vanilla.
3)Add the flour mixture in three additions, alternating with two additions of buttermilk and lemon juice. Blend until just combined.
4)Pour batter into greased and floured 8" cake tins. (I saved some batter to make into mini cupcakes... you know, for mandatory taste-testing and quality control)
5)Bake at 325 for about 30 minutes or until cake tops are springy and a toothpick inserted comes out clean.
*If you are making mini cupcakes, they will take about 15 minutes.
*If you are making regular sized cupcakes, they will take about 20 minutes.
6)Let cakes cool at least 10 minutes in the pan, then turn out onto wire racks to cool completely before frosting.
*Cakes can be stored in an airtight container at room temperature for one day, or wrapped in plastic and frozen for much longer!


Cream Cheese Frosting


  • 8 oz cream cheese
  • 2 oz butter
  • 4 cups sifted icing sugar (you may need more depending on the temperature, my frosting was too soft so I added 1/4 cup extra)
  • pinch salt
  • 1 tsp vanilla extract
1) In a mixer bowl, cream together the butter and cream cheese until fluffy and completely combined. Gradually add the icing sugar about one cup at a time, beating until well combined after each addition. Beat in the salt and vanilla extract. Taste and adjust as needed. If frosting is too thin, add more icing sugar. Too thick? Add a tiny splash of milk.

Frosting can be used immediately  or refrigerated in an airtight container for a few days, or frozen for up to three months.


For the filling of the cake, all I did was take about 1/3 of the cream cheese frosting and added a big handful of fresh raspberries and mashed it all up. I didn't blend it together completely because I was going for the marbled look. Pretty!

(A warning note: the raspberries I added were particularily delicious i.e. JUICY like mad and thinned out the frosting quite a bit. This made things a bit runny and messy and oozing-out-the-sides style when I layered the cake. Perhaps next time I will add more powdered sugar to help thicken it up. Once you put the first layer of frosting on the outside, however, if you stick the cake in the fridge it will firm up and help things along.)


My first rose, woo!

Meringue Buttercream Roses
Recipe from Martha Stewart


  • 3 egg whites
  • 1/2 cup plus 1 tbsp sugar
  • pinch salt
  • 1 cup (8oz) butter at room temperature
  • 3/4 tsp vanilla extract
  • Gel paste food colouring (I used a mixture or golden yellow and lemon yellow by Wilton)
1)In the heatproof bowl of a standing mixer whisk together the egg whites, sugar and salt. Set the bowl over a pan of simmering water and whisk constantly until the sugar has dissolved, about 2-3 minutes, the mixture should feel smooth when you rub it between your fingers. 

2) Once the sugar has dissolved, remove the bowl from the heat and attatch it to your standing mixer. Starting on low speed and increasing to medium high, whip the egg white mixture until it is completely cool, white and glossy and forming slightly stiff peaks. (this takes about 10 minutes)

3) Reduce speed to medium low and add the softened butter one tablespoon at a time, beating until combined after each addition. If the mixture appears to "curdle" after adding the butter, FEAR NOT! This happens to me every. time.  :( But the good news is all you have to do is keep beating, and whip that buttercream back into shape. Just beat it. Like Michael Jackson told you to.

4) Next mix in the vanilla extract and food colouring if desired. YELLOW!

5) You can use the buttercream immediately, or keep it in an airtight container in the fridge for a few days, or in the freezer for up to 3 months. Just bring back to room temperature and beat it some more to get the right consistency.

6) When you're ready to make the roses, fit a pastry bag with a petal tip, then fill the bag with your buttercream. You will also need 1 inch squares of parchment paper, a flower nail and an offset spatula is helpful when moving the flowers from the parchment to the cake.

7) I would reccommend watching a few youtube videos for a visual on how to pipe these flowers. They look complicated, but I found them to be quite simple. The petal tip does most of the work for you! And as always, Martha knows what's best: check out her instructions here. (I just used the petal tip, instead of switching back and forth between two and it worked out fine)

Cake Assembly

1) Place one cake layer on the platter you wish to serve it on. Spread with a thin layer of raspberry jam.

2)Spread the raspberry-marbled cream cheese frosting on top of the jam, no need to spread too far to the edges because it will ooze out otherwise when you put the next layer on.

3)Put the next layer on!

4)Spread a thin layer of cream cheese frosting over the top and sides of the cake, working fairly quickly because oh my goodness this frosting is oozing out the sides and turning my white frosting pinkish and hey maybe that's still cool it's kind of looking like ombre and that's totally in right now maybe I'll just let it happen! But please get a coat of cream cheese frosting on there, pop it in the fridge for at least 1 hour to firm up a bit. I left mine in the fridge overnight, and left the rest of the decorating for the next day which was the day of the party.


5) Using an offset spatula, transfer your buttercream roses from their parchment squares to the top of the cake, arranging how you like.
I had some leftover cream cheese frosting, so I tinted it green and piped some leaves around the roses.

6)Finish the cake off by arranging fresh raspberries around the bottom and TADAA


Slice it, serve with vanilla ice cream, on the patio in the backyard. Rock on.


<3 Lari


Wednesday, 24 July 2013

Blueberry Lemon Scones


"You can't be that kid at the top of the 

waterslide, overthinking it.

You have to go down the chute."

-Tina Fey

I have been saying this to myself a lot lately. I tend to sometimes (ALL THE TIME) overthink small details and drive myself (and others) a little crazy.

For instance it took me way too long to make up my mind whether I should make blueberry scones with lemon, or blueberry scones with almonds.

Sometimes the difference between lemons and almonds is a really big deal guys.


But like the wise Tina Fey reminds me, you have to go down the chute. So I just threw caution and lemon zest to the wind and went down the Blueberry Lemon chute.

And why was I ever doubtful!? Blueberry and lemon are like two really good friends that people like me tend to forget about when all they can think about is chocolate. But I didn't even add chocolate to this recipe! I kept things classy and classic, and the result was dang awesome. Proud moment.


photo.JPG

Fresh blueberries and fresh lemons. It's hard to go wrong! I made six scones, plus one baby scone. That baby one totally has my name on it.

Stop overthinking things and go down the chute. Make scones with the bounty of blueberries sitting in your fridge. Make them for you and your mom before you go to work. Eat them warm with butter and serve with milky tea. Enjoy it.

Because Tina Fey and I told you to.


Blueberry Lemon Scones
Recipe adapted from Martha Stewart
(I halved the recipe to make just a small batch, but it can be easily doubled. Unbaked scones can be frozen and saved in the freezer to bake up when you want them!)

Makes about 6 small scones
  • 1 cup all purpose flour
  • 2 Tbsp granulated sugar
  • 1/2 tbsp baking powder
  • scant 1/2 tsp salt
  • 3 tbsp (1.5 oz) cold butter, cut into cubes
  • 3/4 cup fresh blueberries
  • 1/2 tsp lemon zest (about 1/2 lemon)
  • 1/6 cup almond milk (or any other milk if you prefer)
  • 1 egg
  • Cream for brushing (optional)
  • Turbinado sugar for sprinkling (optional)
Preheat oven to 400 (375 for my hot oven) and line a baking sheet with parchment paper.

In a mixing bowl, whisk together the flour, sugar, baking powder, salt and lemon zest. Use your fingers to mix in the butter with the flour mixture. You don't want to blend the two together completely, just until the butter is in pea sized clumps. This equals flakyness!

Gently fold in the blueberries. In another bowl, whisk the egg into the almond milk. Combine the wet and the dry until they form a dough, you may need to knead it a bit. Need to knead, ha. (Sorry)

Gently roll out dough (don't flatten your butter too much!) onto a lightly floured surface. Use a knife or cookie cutter to cut out your scones. I used a small glass dipped in flour to cut out round scones.

Place on prepared baking tray. Brush the tops with a good amount of cream, then sprinkle with turbinado sugar if desired. Bake for about 20 minutes, until golden brown on top.

Make a pot of tea and serve up some scones, warm from the oven, with butter. Yes.

Warm food straight from the oven with melty butter is probably one of the most magical moments in life. Yes, I am easily pleased.

<3 Lari

PS: Have strawberries instead of blueberries? Make these Strawberries and Cream Scones instead! Equally awesome.

Wednesday, 5 September 2012

Peach and Berries Cobbler-Cake

So, if you happened read this older post, you will recall Anna Olson's monthly Bake Off contest on www.foodnetwork.ca. And you may know how much I love this contest, not only because it gives me another excuse to bake, but because last month... I WON!! I know, I cannot believe it. I still can't. But it is true, and I won my very own KITCHEN AID MIXER... Jaw to the floor. Holy cow I am so stoked about life.

Any who... even though I have already won, I really enjoy participating in the bake off, so I will continue to try out the recipes and post them! This is the picture I sent in along with my description for The August Bake Off: Peach and Berry Cobbler!
Peach Cobbler is the perfect August dessert! And adding berries to it just makes life more exciting. I must say, I used a rather tall 8 cup baking dish, so the cobbler turned into more of a cobbler cake... But I think that was a Happy Mistake.
Another problem I ran into was that the peaches we had bought we SO not ripe, but we had to make do with them because our guests were arriving too soon to buy more! Well great news, turns out even unripe peaches magically transform into tender delicious ones when baked into a cobbler.
I chose to serve this cobbler with a scoop of vanilla bean ice cream and homemade butterscotch sauce, to a few friends and family members on our back candle-lit-porch in the evening... Ah, that is how summer should be. Thanks Anna! My dessert night was a success! (after everyone left, I helped myself to a
second bowl...) :)

Happy Baking!

Peach and Berries Cobbler-Cake
Recipe adapted* from Anna Olson
(*You could say I adapted it... or you could say that I made some happy mistakes along the way which led this to not become the exact recipe that she used... I'm gonna go with adapted.)
  • 6 cups fresh peaches, peeled and sliced
  • 1 cup fresh raspberries
  • 1/2 cup fresh blueberries
  • 3 tbsp sugar
  • 1/4 tsp cinnamon
Toss sliced peaches, raspberries and blueberries with the sugar and cinnamon and put into an 8 cup baking dish. (the deeper your dish, the more cake-like this cobbler will become. This is what happened to me and it worked... but not what the original recipe looks like!)

  • 2 eggs
  • 1/2 cup sugar
  • 6 tbsp melted butter
  • 2/3 cup milk
  • 2 cups flour
  • 2 tbsp cornmeal
  • 4 tsp baking powder
  • 1/2 tsp salt
Whisk eggs, milk and sugar in a bowl. Whisk in milk. Sift the flour, cornmeal, baking powder and salt over the wet ingredients and stir to combine. Dollop this mixture over the peaches and berries. Mine ended up completely covering the fruit, which turned out to be okay! But Anna tells you to leave spaces for the fruit to peak through. Again, depends on your baking dish. Sprinkle a little bit of cinnamon-sugar over the cobbler and pop it into a 375 oven (350 for me!)The recipe says to bake for 35-45 minutes... mine took nearly double that... but just keep an eye on it! Every oven is "special and unique" in its own little way.
=)
Serve with Vanilla ice cream and butterscotch sauce.

<3 Lari


Monday, 30 July 2012

Sweet Strawberry Salsa in the Summertime


A week or so ago I spoke of my family's homemade version of Salsa Fest, in which we sampled a variety of salsas. Most of these salsas made their way into our mouths via tortilla chips, the common vehicle for this delish dish. However, my dessert loving self thought, "Why stop at savory?" and carried the salsa fun into the dessert course!

When I found out that it was Salsa Fest and decided that I MUST have a salsa party of my own, I immediately paroozed the internet for some salsa inspiration.  I am not a huge lover of spicy foods (something I am currently working on building a tolerance for), so when I found this recipe by Michael Smith for a sweet version of this usually spicy condiment I thought, "I can handle this."

And who can't handle Sweet Strawberry Salsa? Served on vanilla ice cream. I know, I know, part of me thought that salsa on ice cream would be kind of weird... but so many things that you think would be weird turn out to be THE BEST THINGS EVER. (i.e. salted caramel, french toast+syrup+peanut butter, tea, sudoku)

So try it. And love it. And eat it outside because it is summer and that is what you do. 
I pretty much followed the recipe (with a small adaptation) but it would be neat to try it with other fruit either replacing or added along with the strawberries. Peaches, mangoes, kiwi... yum.


Sweet Strawberry Salsa in the Summertime
(I like alliteration...)

  • 12 strawberries rinsed, hulled and chopped into pieces
  • zest and juice of 1 lime
  • 1 tbsp sugar
  • 2 tbsp chopped cilantro
  • 2 tbsp chopped mint
  • 1/4 cup shredded coconut (I used sweetened but unsweetened would be totally cool too)
Okay this is the hard part: Toss everything in a bowl.
DONE.

Serve it over vanilla ice cream, and be surprised at how great salsa can be as a dessert. You can count on me to find a way to turn anything into dessert form. As my big bro would say, are you a Mexican, or a Mexican't?

XO Lari


Tuesday, 24 July 2012

Obsessions: Summer Berries

I love to daydream, a lot. I pretty sure 99% of my daydreaming adventures have something to do with food. Hey! That is not weird or sad. That's just the way it is. Often I will become obsessed with a certain ingredient or theme and I spend my time thinking about all the different uses for it. So you will notice that once in a while or more I will make posts of my current foodie obsessions, and who knows! Maybe I will try making one of them.

Berries at this time of year are crazy delicious, and my Ma and I eat many many many of them. They are so tasty that we usually just eat them fresh, and can't be bothered to cook with them. Why change a good thing right?

However, I also firmly believe that cooking with awesome ingredients can only yield one thing: more awesomeness. SO... if fresh summer berries like raspberries, blueberries, blackberries etc are so flippin' good all on their own, imagine how yummy they'd be in a pie? Or on top of a cheesecake? Or folded into cake batter? Or with a summery creme brulee? Or cobbler...or...or...

Hence I present to you the first edition of my Obsessions: Summer Berries. If that was not obvious already.


I know for a fact! that my Mother went to a farmers market today, with the intent of buying more fresh berries. So I have brilliant timing on this one. Thanks Marmy :)


IDEAS:


These Blueberry Scones with lemon zest From Mrs F would make a lovely breakfast or tea time treat


These simple but cute Sweet Tarts from Bakerlla are a classic summery treat, which I could eat everyday, all summer. With ice cream of course, Dad.


Also, Mini Raspberry Mousse Tarts via Bakers Royale sound divine. Probably because of the dark chocolate bit on the bottom...

SO MUCH BERRY LOVE

So berry much love?
(that was bad, sorry.)

This is Lari signing off, telling demanding you to eat more berries this summer. Copious amounts. In all forms.
XO Larissa