Showing posts with label tart. Show all posts

Monday, 19 August 2013

A Quiche for Julia


On August 15th this year, Julia Child would have turned 101 years old! So obviously we celebrate! With quiche!

Last year I wanted to acknowledge Julia's 100th birthday when I found out about it, so I cooked her recipe for a savory cheese souffle. And you know what? It turned out awesome! I felt so fancy cooking up something from her very own cookbook. So... I have decided to make it a bit of a yearly tradition. On her birthday, August 15th, I will cook something by Julia, for Julia!

This year: quiche.

I am such a quiche fan! It feels classy somehow, even though it is just any ingredients mixed in eggs in pastry. But pair it with a garden salad and BAM! You have a classy lunch, or light dinner.


The other awesome thing about quiche is that you can really put in whatever ingredients you like, or whatever you have in your fridge. In this scenario, I did caramelized onions and mushrooms. Oh yes and cheese. Because, cheese.


Happy Birthday to Julia! 
And as she would always say, Bon Appetit!

Mushroom and Onion Quiche
Recipe slightly adapted from Julia Child


So I must confess, my quiche did not turn out quite how I was hoping it would. It was delicious don't even worry! However I did not bake the crust long enough (and made a mistake with the oven temperature...oops) so while the sides of the crust were buttery and flaky like a dream, the base of the crust was quite undercooked. 

I will give Julia's instructions here, and hopefully it will work better for you than it did for me. I know Julia would have not given up (!) so I shall definitely try again and get the temperature right this time and hopefully perfect the art of quiche-making. I will tell you though, that if you think "maybe it should be a little more baked before I add the filling" then yes, listen to your heart. I didn't. And ended up with unbaked pastry. Nobody wants that.

Pastry:
  • 2 cups all purpose flour
  • 1 tsp salt
  • 1/4 tsp sugar
  • 8 ounces cold butter cut into cubes
  • 1/2 cup ice water (plus a bit extra as needed)
Whisk together the flour, salt and sugar in a large bowl. Add the cold cubes of butter and using your sparkling clean hands, blend the butter into the flour with your fingers, breaking it up into pieces. Keep working the butter into the flour until the chunks are pea-sized. Drizzle in the cold water and using a cupped hand, quickly bring the mixture together to form a ball of dough. You will probably need a tablespoon more water to get all the flour to come together. 

On a lightly floured board, form the pastry into a ball and use the heel of your hand (not your palm because it will be too warm and will melt the butter) just smear the pastry against the board a few inches away from you. This helps to bring the pastry together completely. Flatten pastry into a round disk, wrap in plastic and chill in the fridge for 2 hours or overnight. The pastry will also keep for weeks in the freezer.

After the pastry has had time to chill, we can roll it out! Using a rolling pin, start in the center of the disk and just use small motions at first, turning the pastry after each roll to keep the circle even. Continue rolling out the pastry until it is 1/8" thick.

Grease an 8" tart pan with removable bottom with butter. Transfer the pastry into the pan. This is done easily by rolling the pastry round onto your rolling pin, then unrolling it over top of the tart pan. Press the pastry into the corners and up the side of the pan. Use your rolling pin to trim the excess pastry and isn't it looking gorgey already?!

But hold on, we gotta pre-bake this baby first. Like definitely.

Prick the bottom of the pastry all over with a fork. Place a piece of parchment on the top and fill the empty tart with dried beans or pie weights. If you are not baking the shell right away, keep it in the fridge! Bake the shell in a 400 degree oven until set, 7-10 minutes. (I will do more next time!)

Remove the parchment with the beans or weights and place the tart shell back in the oven to brown for 3 minutes or so.

Let the shell cool completely before adding your filling. You can unmold the tart from its pan now, or wait until your quiche is completely finished. I chose the latter option, just to be safe.

Filling:
  • 1 tbsp cream
  • 1 cup minus 1 tbsp milk (I used skim because that's what I had)
  • 3 eggs
  • salt and pepper
  • pinch nutmeg
  • 1-2 tbsp olive oil
  • 1 onion sliced
  • 1/2-1 tbsp butter
  • about 8 mushrooms, sliced
  • 1 clove garlic, minced
  • Optional: 1 slice Swiss cheese, torn into pieces
First, start by caramelizing the onions. I could eat anything with caramelized onions. Maybe even ice cream.

Heat a wide pot over medium low heat with the olive oil. Onve the pan is hot, add the onion slices and cook over a low to medium low heat, stirring occasionally, for a looooong time. How long? Maybe even up to an hour. Woah! Because good things take time my friends. Low and slow is the game. When the onions are soft and golden and caramelized like magic, you may remove them from the pot into a bowl and set them aside.

In the same pot, toss in a dab of butter along with the sliced mushrooms and garlic. Take a moment to appreciate the way your house now smells. Saute the mushrooms until they have lost their liquid and are cooked through. I added my onions back into the pot about halfway through... because I wanted them to make friends. Once everything is cooked to your liking, turn off the heat and set this mixture aside.

In a medium bowl, whisk together the eggs, milk and cream and seasonings. This mixture can be kept in the fridge for a few hours if not used right away. Also, to this mixture you can add your own ingredients if your not feeling the onion and mushrooms. You could add cheese, sauteed veggies, cooked meats like BACON. I like where you're going with this...

When you are ready to bake your quiche, call your aunt and invite her over for a nice lunch. Then, preheat your oven to 375.
Spoon some of the onion and mushroom mixture over the bottom of the tart crust. Pour in the egg filling to just below the top of the tart and sprinkle the cheese pieces over the top.

*Note: I only used about half of my filling mixture in my quiche. The rest I baked up in a buttered baking dish to make a second crust-less quiche.

Bake for 20-25 minutes until the quiche has puffed up and turned golden brown. Julia says that once it has cooked, it should not wiggle in the center.

Remove from the oven and let cool for about 10 minutes before serving.


Serve alongside a garden salad avec a light vinaigrette and be proud that you just made quiche. Even if your pastry isn't fully cooked. You're still awesome. And so is Julia!

Bon Appetit!

<3 Lari

Sunday, 11 August 2013

Peach-Raspberry Tart with Cornmeal Crust


Fun Fact Number 1: August 11 happens to be National Raspberry Tart Day in the United States. 
Fun Fact Number 2: I was planning on making a peach and raspberry tart on August 11 ANYWAYS!

Don't you love it when life just lines up like that? But please do not feel that you must wait for an irrational National Food Holiday to bake a delicious summer fruit tart. You should do it just because you want to. And because you have a bounty of ripe fruit begging to be eaten! Like that is a problem.


I love summer for all of the fresh fruit! It seems like there is so much of it around and it tastes SO MUCH BETTER when it's in season. I want all the fruits. I made this tart with just peaches and raspberries but you could really use whatever fruit you have on hand. Apricots, nectarines, strawberries, blueberries, blackberries, pitted cherries... You could use a combination of fruits or just one fruit...choose your own fruity adventure.


The crust has cornmeal in it, woah! It pairs nicely with the summery fruit and adds a little crunch in texture. Not feeling the cornmeal? You can replace it and just use all flour. But cornmeal is kind of exciting! Is my life that boring that I get excited about cornmeal? No, I'm gonna go with cornmeal is really exciting. What? You are not excited about cornmeal? Weird.

PS This was my first debut of my NEW TART PAN SET WITH REMOVABLE BOTTOMS which I have been dying to use since I got them as a gift like 6 months ago... finally! It feels darn good. Let there be TARTS! I can also sense a quiche in my future... my pie senses tell me. And my pie senses are quite keen these days...

Peach-Raspberry Tart with Cornmeal Crust
Recipe barely adapted from Martha Stewart

Crust:
  • 3/4 cup all purpose flour
  • 1/2 cup corn meal
  • 3 tbsp. granulated sugar
  • 1 egg yolk
  • 3.5 oz butter (7 tbsp.) cut into cubes
  • 1/2 tsp vanilla extract
Filling:
  • 3 peaches cut into slices
  • 3/4 cup fresh raspberries
  • 2 tbsp. brown sugar
  • 2 tbsp. granulated sugar
  • 1 scant tbsp. turbinado sugar for sprinkling

Directions:
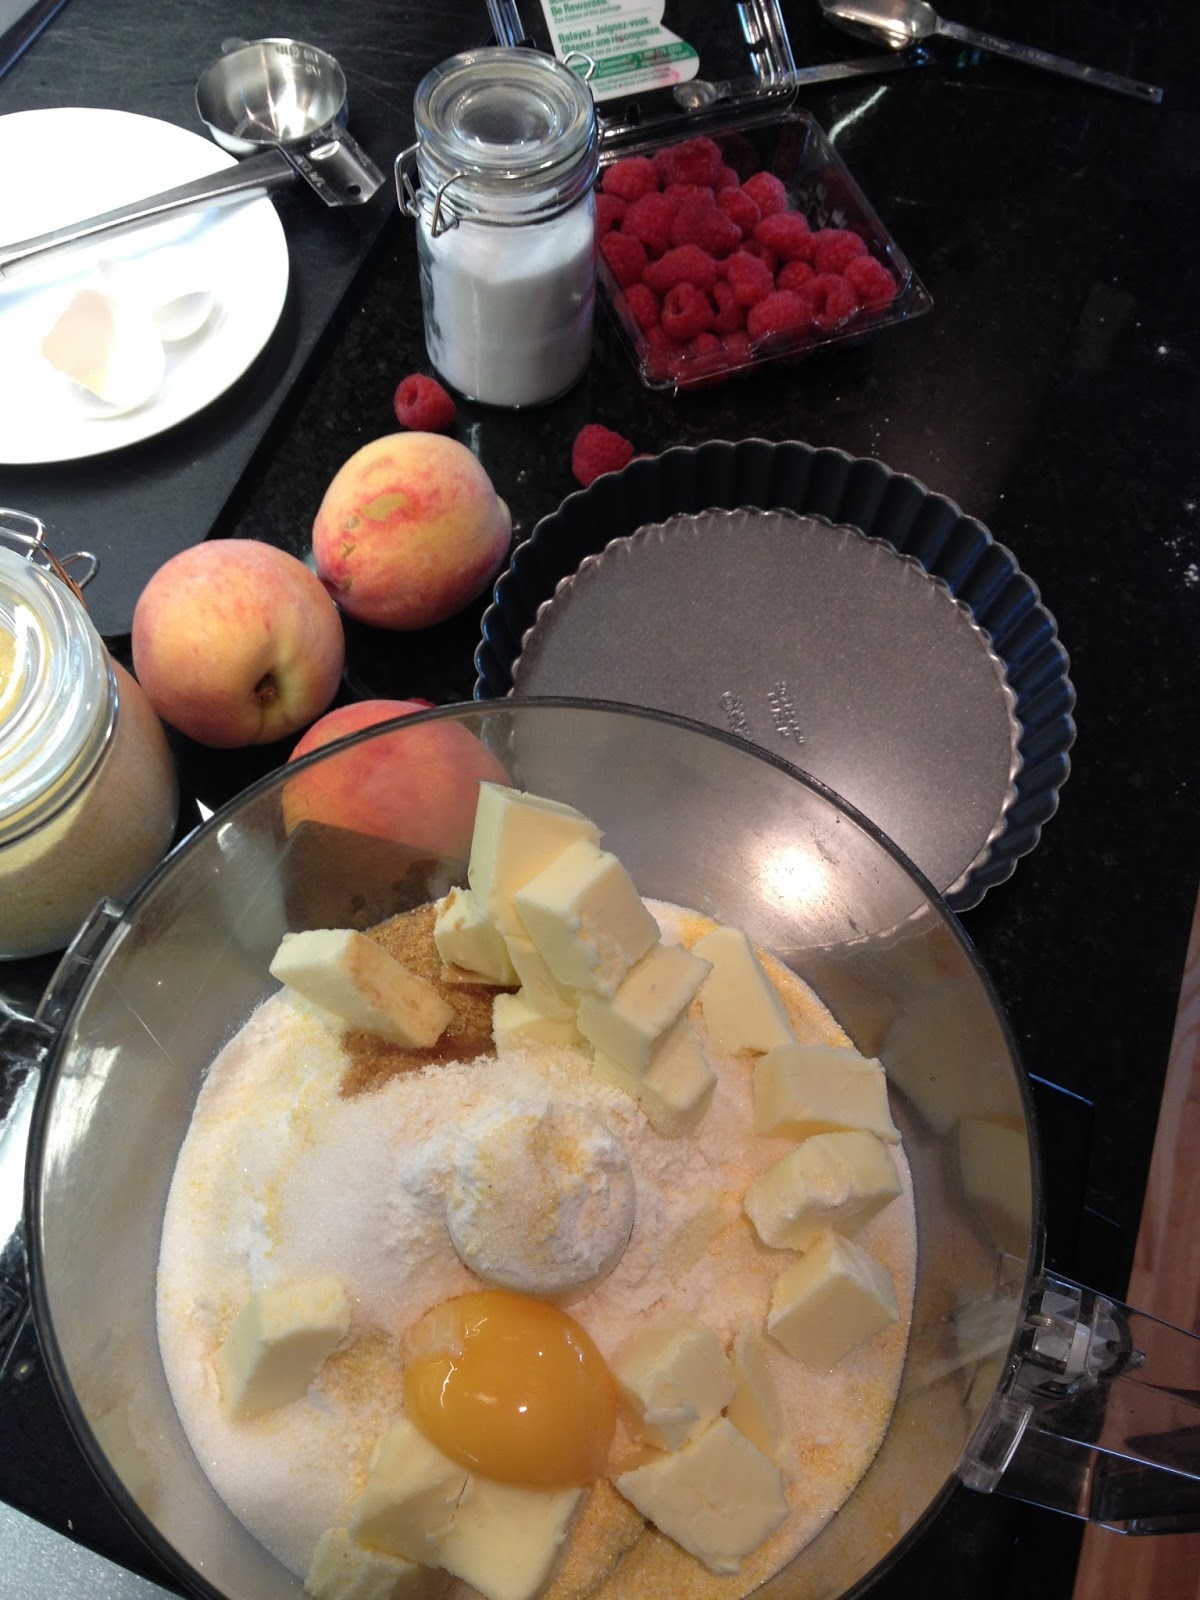
  1. Place all the ingredients for the crust into a food processor and whiz it up! Doesn't get much easier than that. Dump the mixture into an ungreased 8 inch tart pan with removable bottom. (If you don't have a tart pan you can also use an 8 inch springform pan. Press the crust mixture evenly into the pan and up the sides. Place the tart pan onto a rimmed baking sheet. Bake the crust at 400F for about 15 minutes until it is puffed and slightly golden. Remove the crust from the oven and press it down with an offset spatula. Reduce the oven temperature to 375F
  2. In a medium bowl, toss together the peach slices, raspberries, brown and granulated sugar.
  3. Pour the fruit filling mixture into the partially baked crust and sprinkle the top with some turbinado sugar. Place back in the oven to bake for another 30-35 minutes, or until fruit is tender and bubbly and the edge of the crust is golden brown.
  4. Remove from the oven and move tart pan to a wire rack to cool.
  5. Serve warm or at room temperature and VANILLA ICE CREAM :) (obviously)
Enjoy!

<3 Lari

Sunday, 9 December 2012

Tarte Tatin

Is this really happening? Am I really making another post after nearly two months? It's a miracle! Tomorrow morning I have my art history exam for school and I should most likely be studying right now. But guys, I have priorities! Pie Priorities, to be exact. And I miss talking about food. So I'm back.

So school is stressful. Yup that is a well known fact. A little too well known by me for my liking. I love the work that I do in school but sometimes (a lot of the time) I MISS BAKING!


There is not a lot of time for baking when you are a student unfortunately. But a miracle happened the other day AND I HAD TIME TO BAKE!

I also had a large bag of apples from our neighbor's backyard that needed to be dealt with. Little late on the fall baking... whateva.

I also have been dying to try my hand at making a classic Tarte Tatin.

SO TADAA!

Tarte Tatin (pronounced tart tatahn... with my sad attempt at a french accent) is a classic French dessert, that if I am correct, was invented by two sisters with the last name of Tatin. The making of this tart caused a lot of confusion in my house as to how exactly to pronounce the title. My advice is to just pretend you are an elegant french lady (or man when applicable) and say it quickly with confidence. (Note, this advice is applicable to nearly all life situations.)
The tart itself is similar to an apple pie, but you bake it upside-down, which is just whimsical!

The journey begins with a cast iron pan on the stove with lots of butter and sugar and arranged apple slices, we then take the party to the oven to slowly cook the apples, then we add a layer of puff pastry to the top, bake until it is, well, puffed, then out of the oven and FLOP it over (gracefully, please) onto a platter so the pastry is on the bottom and your apples are prettily displayed on top! How romantic, sigh. BON APPETITE!


Tarte Tatin
Recipe is from my dear Martha and her amazing Pies and Tarts book

  • 1/2 box of store bought frozen puff pastry, thawed
  • 1/4 cup butter
  • 1/2 cup sugar
  • 3-4 pounds your neighbours apples (If your neighbours do not have apples to give you, you should use store bought and promptly find new neighbours)
  • Cast iron pan, 10 inches in diameter
On a lightly floured surface, roll out the thawed puff pastry dough to about a 10 inch square. Using your pan as a guide, cut out a 10 inch circle. Transfer to a parchment lined baking sheet and chill until firm, or about 30 minutes.
As your pastry is chilin' coat your pan GENEROUSLY with the butter. Seriously, use it all. It looks like a lot, and it is a lot. But what were you expecting? It's a dessert. Now sprinkle the sugar all over the bottom in an even layer. Peel, core and quarter (or thickly slice) your apples. Arrange the apple slices in pretty, overlapping circles in the pan. Keep in mind that we are flipping this whole thing over once it is done, so make that bottom layer beautiful!
Place the pan on the stove over medium high heat and cook it (Without stirring!) until the juices are a deep golden colour and it is happily bubbling away. This takes about 18-20 minutes. This stage is to turn your sugar and butter into a delicious caramel type of sauce.
Now, pop the whole pan straight into a 425F preheated oven and bake for 20 minutes. Remove the pan from the oven, and place your chilled pastry overtop of the apples. return the pan to the oven and bake for an additional 23-28 minutes to brown the pastry.
Take the pan out of the oven and invert the tart onto a large serving platter or plate and have a "tadaa!" moment. My "tadaa" moment was rather anti-climactic, I won't lie, as a few of my apples stuck to the bottom of the pan. Do not fear! Do not get mad. Do not let it ruin your Tarte Tatin experience. Just calmly and gently remove them with a fork or spatula and place them on the tart as if nobody saw.
Serve right away while the tart is still warm so your vanilla ice cream can melt into the apple-y goodness.

Happy French Baking!

<3 Lari

Sunday, 21 October 2012

Pumpkin Mousse Tart

YEAH THANKSGIVING!
I am thankful for the fact that I get to make desserts.
I was extra thankful this year, because I not only got to have one thanksgiving dinner... but TWO! which also meant I got to make not one dessert... but TWO!
So much to be thankful for.
I shall post the other recipe in the near future, but for now I have a spiffed up variation on the classic dessert of pumpkin pie. Don't get me wrong, pumpkin pie is the cat's pajamas but I am always looking for unique and creative spins on the classics. So for my family dinner this year, I made a Pumpkin Mousse Tart!


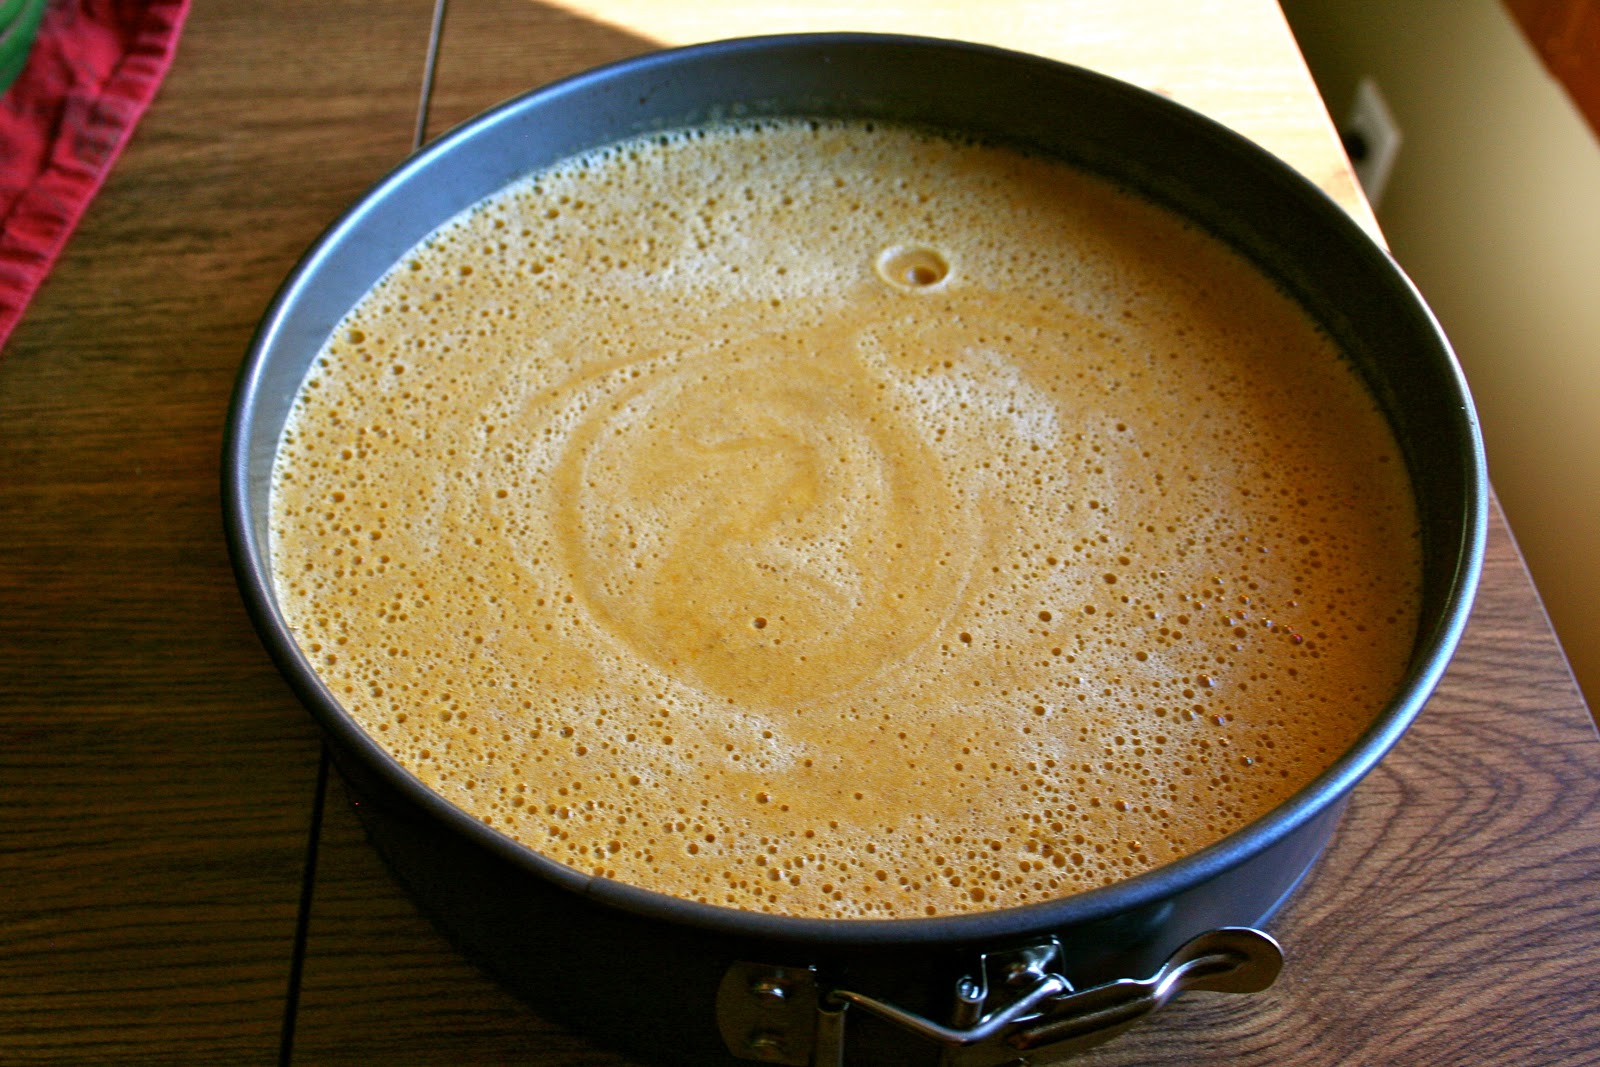
This is it before it get suited up with whipped cream... looking very surface-of-strange-planet like. Hence, we cover it with whipped cream. But that is not the only reason... Thanksgiving without whipped cream is like the Mac without the Cheese.

Some notes: The crust is a chocolate spice graham cracker crust and is entirely addictive, and you may find yourself going back for seconds just because you want more crust. This was proven by my cousin and I.
This is a great dessert choice for a big family meal because the mousse part needs to chill for at least 4 hours. This way you can make it way ahead of time! Less stress.
Pumpkin Mousse Tart
Recipe from good old Martha

Chocolate Spice Graham Craker Crust:
  • 9 ounces graham crackers
  • 1/3 cup plus 2 tbsp granulated sugar
  • 3 tbsp cocoa powder
  • 1/4 tsp ground cinnamon
  • 1/8 tsp ground nutmeg
  • 3/4 cup melted butter
Place everything except the butter in a food processor and pulse until everything is finely ground. Stir the crumb mixture in a bowl with the melted butter until combined. Press into a 9" spring-form pan. (If I had a tart pan with a removable bottom, I would have used that instead! So feel free to do so if you do. And if you are wondering what to get me for my birthday coming up... well now you know.) Bake at 325 until set, 12-15 minutes. Let cool completely, do not remove from pan.

Now, time to prepare the Pumpkin Mousse!
You'll need:

  • 1/4 cup brandy
  • 2 tbsp unflavoured powdered gelatin
  • 2 tbsp water
  • 3 eggs (preferably room temperature)
  • 3/4 cup sugar
  • 1/4 cup water
  • 1 1/2 cups pumpkin puree (canned or homemade)
  • 1/4 tsp ground allspice
  • 1/4 tsp ground ginger
  • 1/2 tsp salt
  • 1/4 cup sour cream
In a small microwaveable bowl, pour in the brandy and 2 tbsp water, sprinkle over the gelatin and let stand for ten minutes or so to soften.
In the bowl of an electric mixer fitted with the whisk attachment, whisk the eggs on medium-low speed until nice and fluffy, 2 minutes or so. Meanwhile, keeping your mixer going, combine the sugar with 1/4 cup water and cook stirring occasionally over medium high heat until it reaches 245F. (Use a candy thermometer). Turn your mixer to high speed and immediately  (but carefully!) pour in the hot syrup down the side of the bowl in a thin, steady stream. (This is to avoid splashing, and also to incorporate the hot syrup with the eggs without cooking them too fast.) Continue to beat on high speed for about 5 minutes until the mixture increases in volume and turns a pale yellow colour. Meanwhile, put the bowl with the gelatin in the microwave and heat for 10-15 seconds until gelatin is dissolved and melted.
Turn mixer to low and add gelatin mixture. Add the pumpkin puree, spices salt and sour cream and stir to combine.
Pour the mousse mixture into your cooled crust, and leave it to set in the fridge for at least 4 hours, or even up to overnight. 

Finishing Touches!
  • 1 1/2 cups heavy cream
  • 2 tbsp powdered sugar
  • 1/2 tsp vanilla
  • 1/2 tsp skim milk powder (optional, but it's there to keep your whipped cream peaks perfect for hours... works like a charm!)
Whisk together all ingredients until you get stiff peaks. Transfer whipped cream to a piping bag fitted with a large star tip. Run a knife or a offset spatula around the outside of your tart to release it from the spring-form pan, remove the sides of the pan and set your tart on a pretty platter or stand. Get fancy and pipe the cream however you like to cover the top of the tart. I piped little dollops all over, starting in the center and spiraling outwards, but get creative and do what you wish!

An awesome end to an awesome meal.
I <3 Thanksgiving.

XO Lari